> ## Documentation Index
> Fetch the complete documentation index at: https://docs.minimus.io/llms.txt
> Use this file to discover all available pages before exploring further.
# User Groups
> Configure SAML group-based role assignments in Minimus for Azure, Okta, Google, and other identity providers
Add groups to control role-based access for SAML users (users who sign in with SSO). Groups are supported for Azure, Okta, Google and more.
## Overview
The process is simple:
1. In the Minimus console, configure SSO and enable SAML. [Learn more](/sso/saml)
Make sure to configure the **groups mapping attribute** in the Minimus SAML form.
2. In your identity provider, assign the relevant groups to the Minimus application. [See the Okta example](https://docs.minimus.io/sso/okta#assign-access-in-okta)
3. In the Minimus console, add the groups and set their role. [Learn about user roles](/manage/user-roles)
That's it. Permissions will automatically take effect the next time group members log into Minimus.
## Add groups (Okta, Google, other)
SSO must be configured and enabled before you can manage groups in Minimus.
1. In the Minimus SAML form ([direct link](https://images.minimus.io/manage/access/users?saml=open)):
1. Enable **Step 4: Group Mapping**.
2. Keep the default selection: **Google / Okta / Other**
3. Enter the group mapping: `groups`
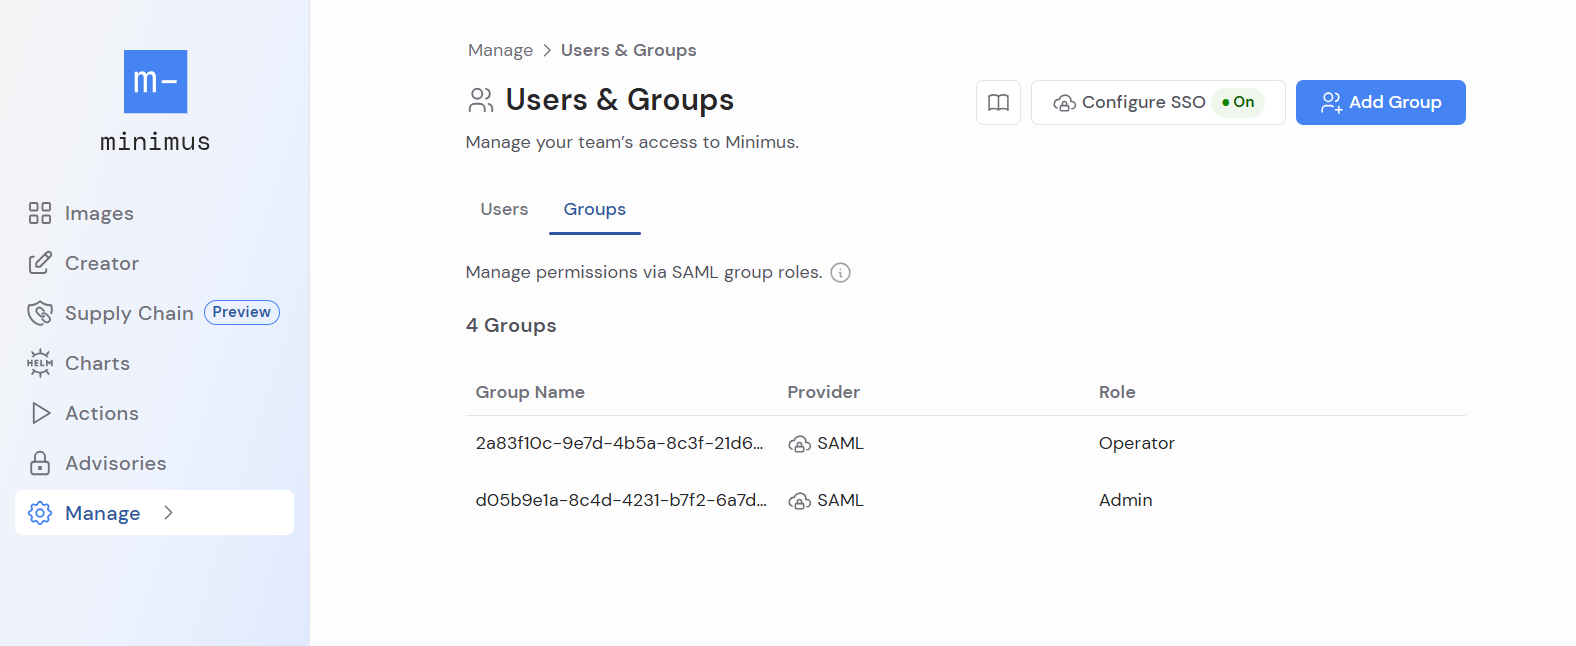
2. Next, go to **Manage > Users & Groups** ([direct link](https://images.minimus.io/manage/access/groups)).
3. Click **Add Group** (top right).
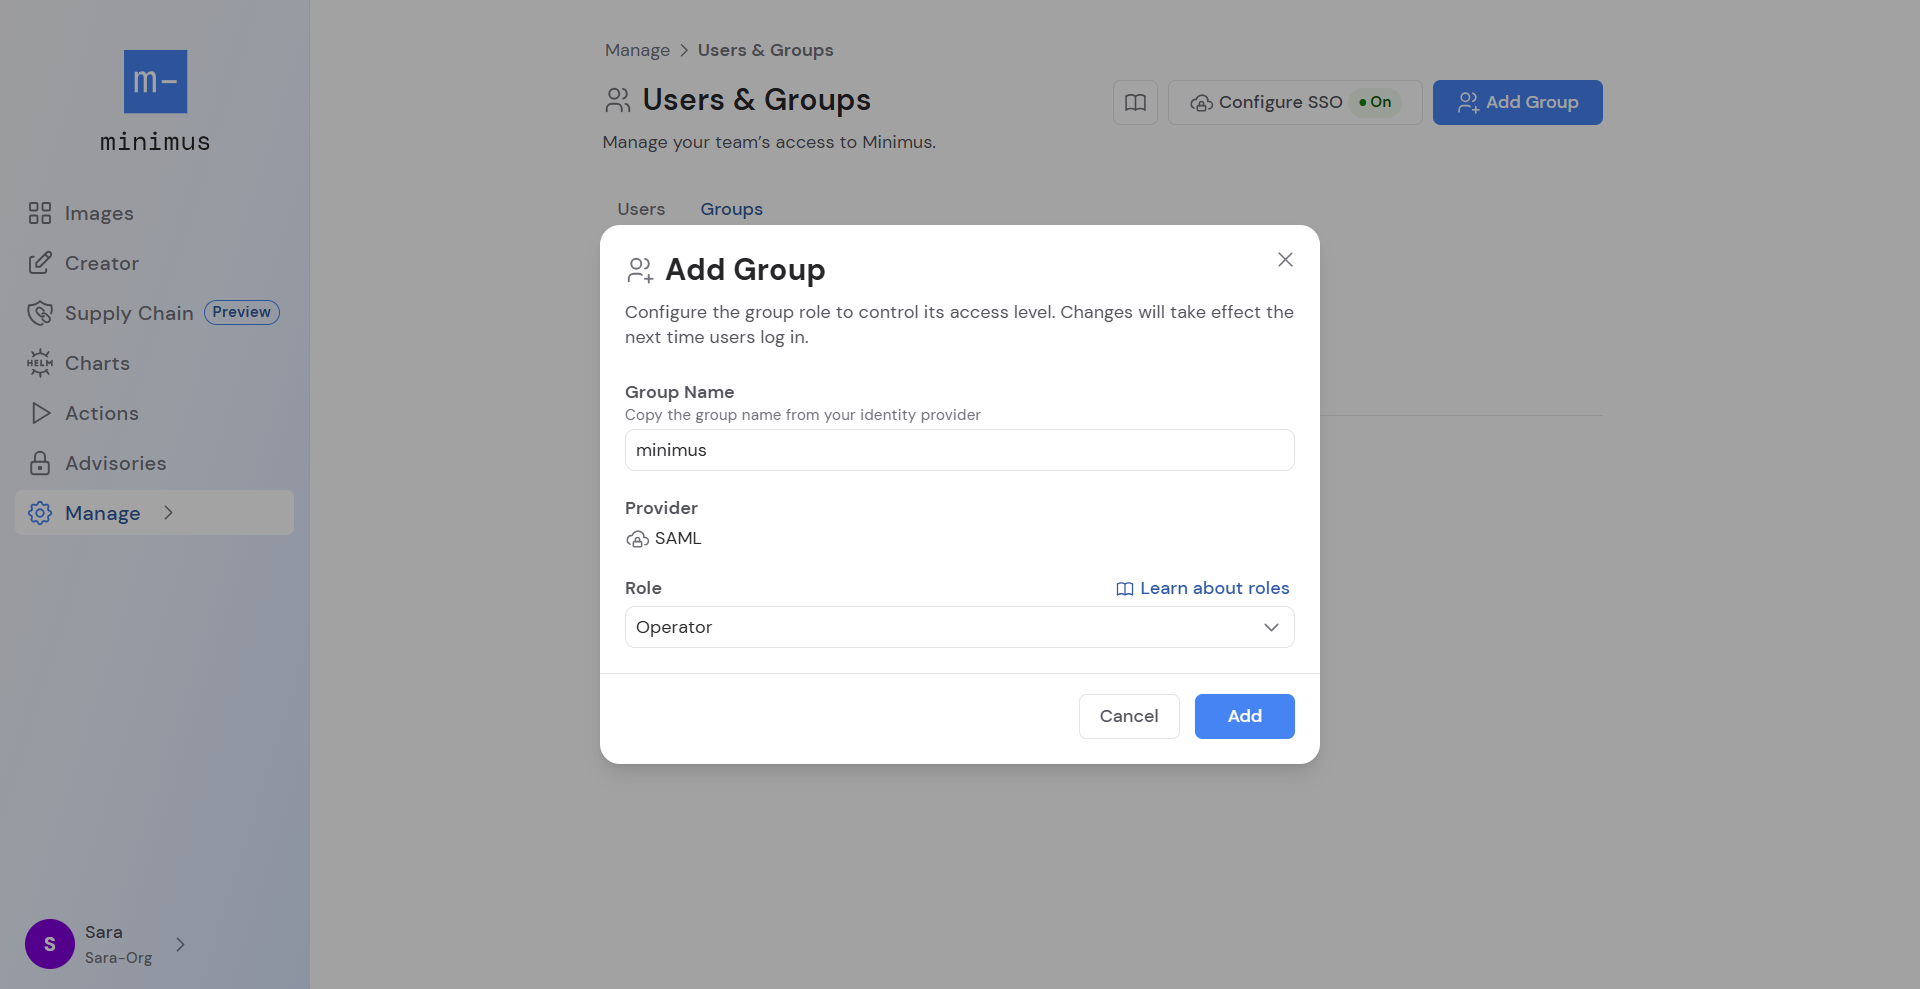
4. Fill in the form:
1. Specify the **group name** (or group ID) as listed in the identity provider.
2. The provider will be set to SAML. This setting is hardcoded.
3. Select the **role**: viewer, operator, admin. [Comparison of roles](/manage/user-roles)
1. **Viewer** is the default role. If no role is assigned, viewer will be automatically assigned.
2. **Operator** role.
3. **Admin** role.
5. Save your changes. Changes will apply the next time a group member logs in with SSO.
 ## Configure Azure groups
There are 2 different ways to map Azure groups to Minimus. The Minimus SAML form is configured differently for each.
### Azure group names
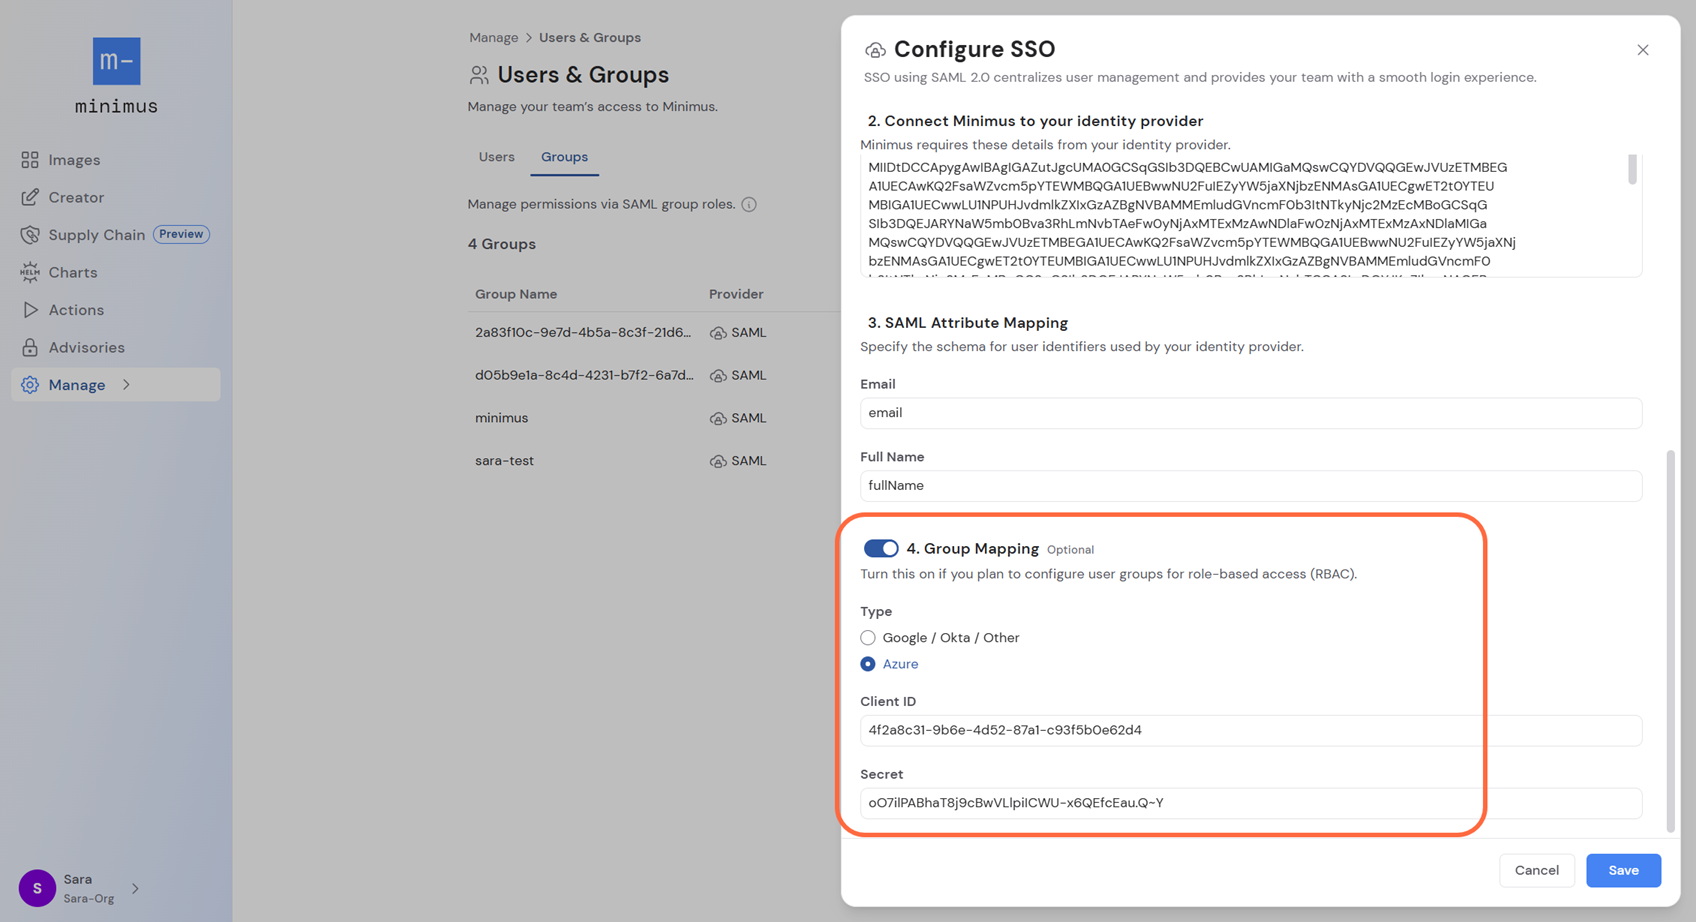
1. Open the Minimus SAML form ([direct link](https://images.minimus.io/manage/access/users?saml=open)):
1. Enable **Step 4: Group Mapping**.
2. Select: **Azure**
3. Fill out the following Azure parameters:
* **Application ID** (also shown as **Application (client) ID** depending on where you look it up in Azure)
* **Client Secret**
## Configure Azure groups
There are 2 different ways to map Azure groups to Minimus. The Minimus SAML form is configured differently for each.
### Azure group names
1. Open the Minimus SAML form ([direct link](https://images.minimus.io/manage/access/users?saml=open)):
1. Enable **Step 4: Group Mapping**.
2. Select: **Azure**
3. Fill out the following Azure parameters:
* **Application ID** (also shown as **Application (client) ID** depending on where you look it up in Azure)
* **Client Secret**
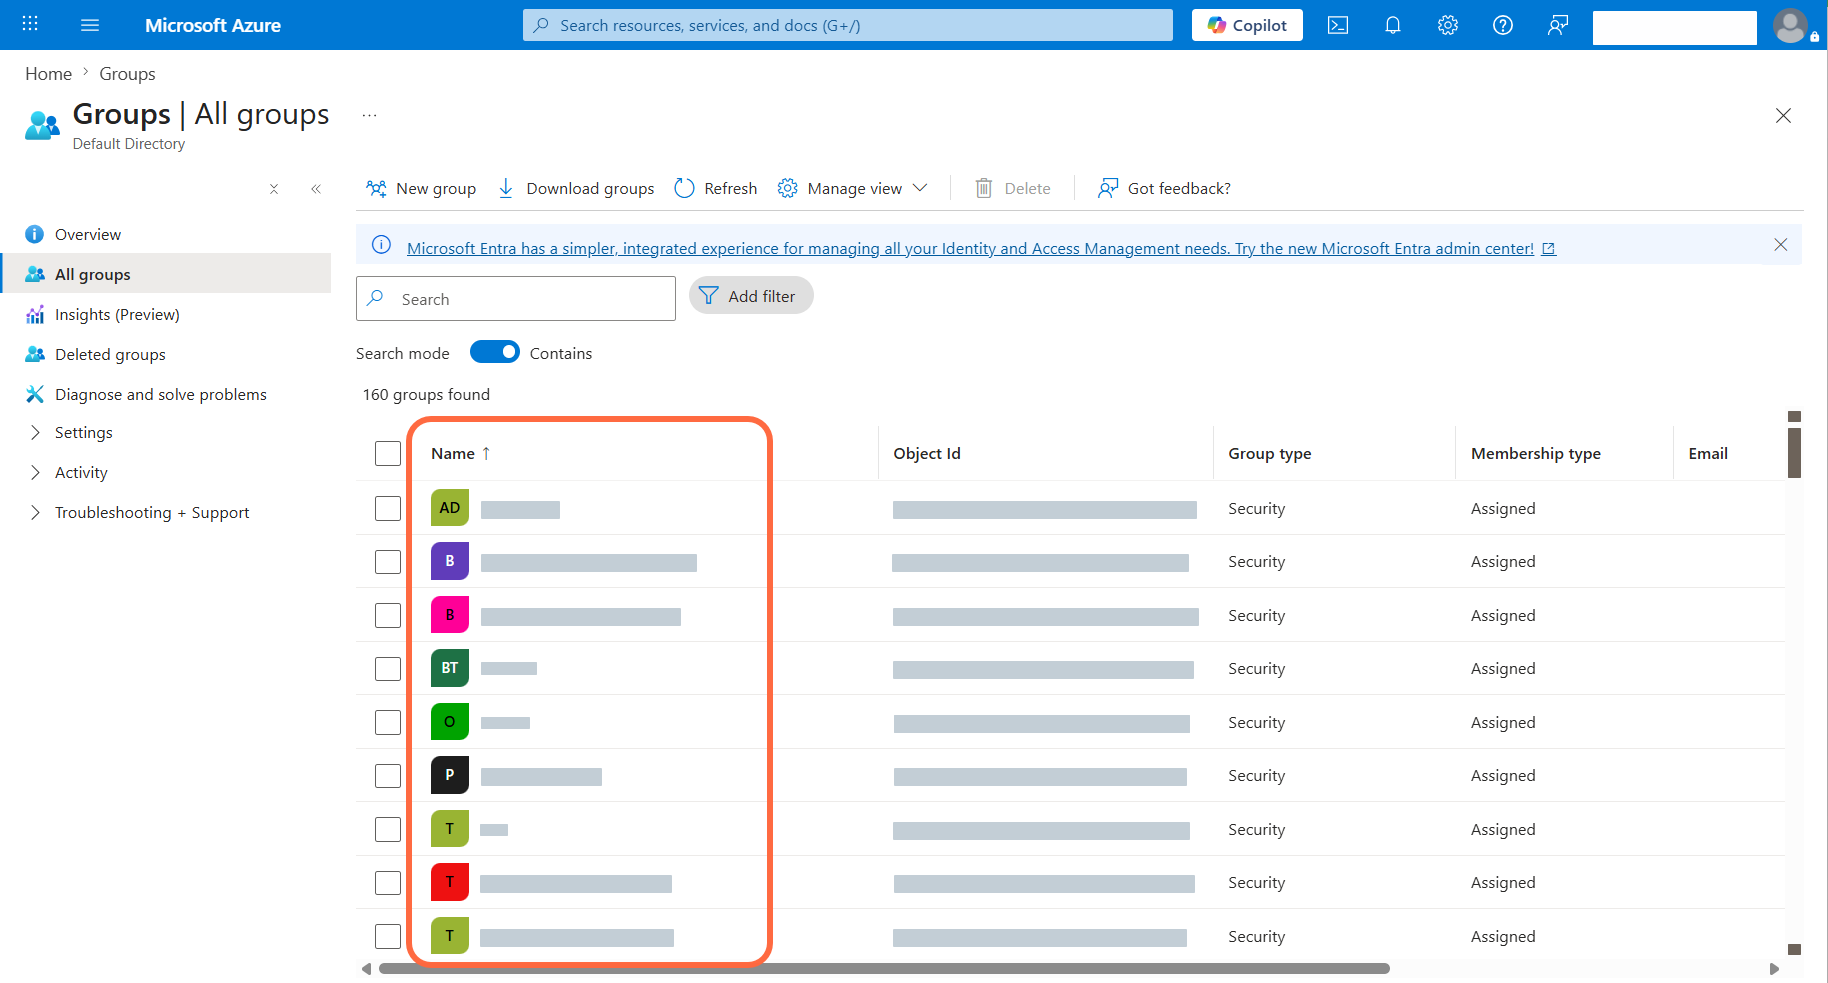
 2. In Azure, look up your Azure groups. You can search for "groups" in the top searchbar.
 3. In the Minimus Groups form ([direct link](https://images.minimus.io/manage/access/groups)), add the groups by group name.
### Azure group IDs
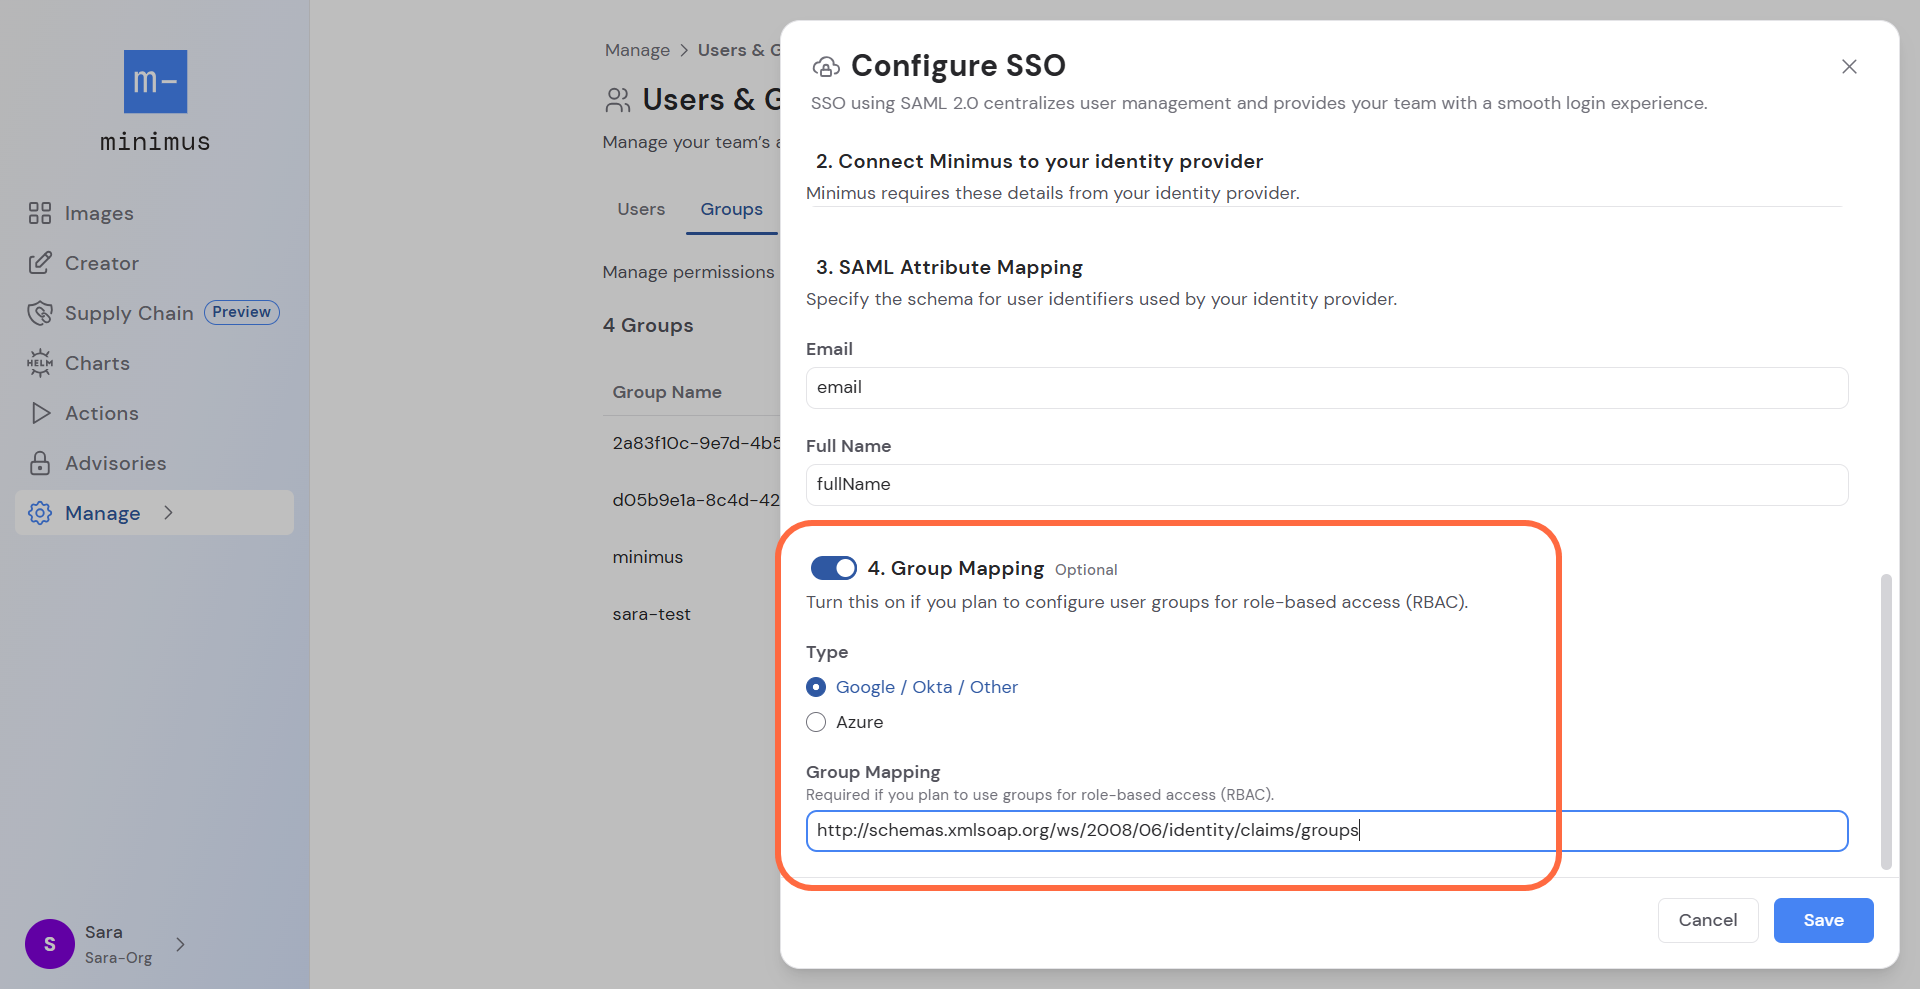
1. Open the Minimus SAML form ([direct link](https://images.minimus.io/manage/access/users?saml=open)):
1. Enable **Step 4: Group Mapping**.
2. Keep the default selection: **Google / Okta / Other**
3. Enter the Azure group mapping:
```shellscript theme={null}
http://schemas.xmlsoap.org/ws/2008/06/identity/claims/groups
```
3. In the Minimus Groups form ([direct link](https://images.minimus.io/manage/access/groups)), add the groups by group name.
### Azure group IDs
1. Open the Minimus SAML form ([direct link](https://images.minimus.io/manage/access/users?saml=open)):
1. Enable **Step 4: Group Mapping**.
2. Keep the default selection: **Google / Okta / Other**
3. Enter the Azure group mapping:
```shellscript theme={null}
http://schemas.xmlsoap.org/ws/2008/06/identity/claims/groups
```
 2. In Azure, look up your Azure groups. You can search for "groups" in the top searchbar.
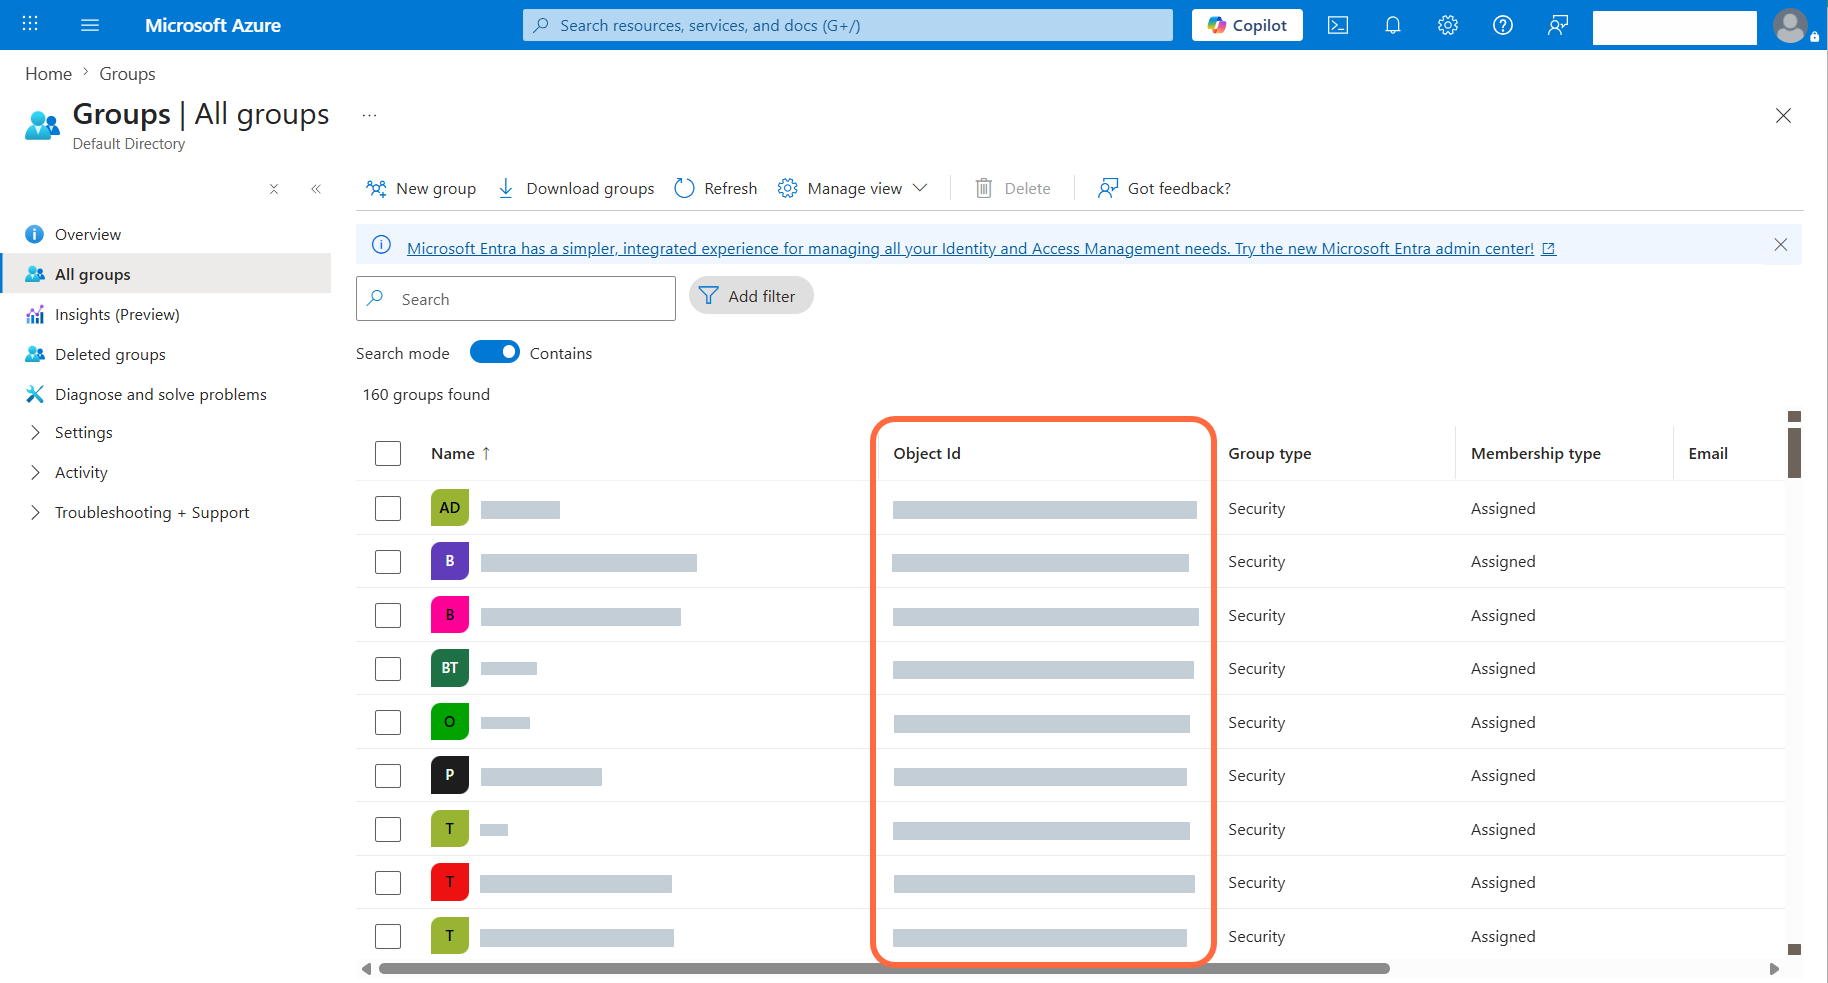 3. In the Minimus Groups form ([direct link](https://images.minimus.io/manage/access/groups)), add the groups by Azure group ID.