Prepare the SSO form in Minimus
- Open the Minimus SSO form. You can use this direct link or navigate as follows: Go to Manage > Users & Groups. Then click Configure SSO at the top of the page.
-
The form has 3 parts:
- Configure Minimus as a custom app in your identity provider - You will copy these parameters from Minimus to Google in the next steps.
- SP Entity ID
- Reply URL (Callback / ACS URL)
- Relay State (optional) - If you leave the Relay State blank, users will only be able to login with SSO from the Minimus homepage.
- Connect Minimus to your identity provider - You will fetch these parameters from your Google custom app and save them to the Minimus form.
- Login SSO URL
- IdP Entity ID
- Certificate
- SAML Attribute Mapping - Google uses the standard AD claim formats.
- Email - input
email(in lowercase). - Full name - input
firstName(Note the camel case). - Group mapping
- Email - input
- Configure Minimus as a custom app in your identity provider - You will copy these parameters from Minimus to Google in the next steps.
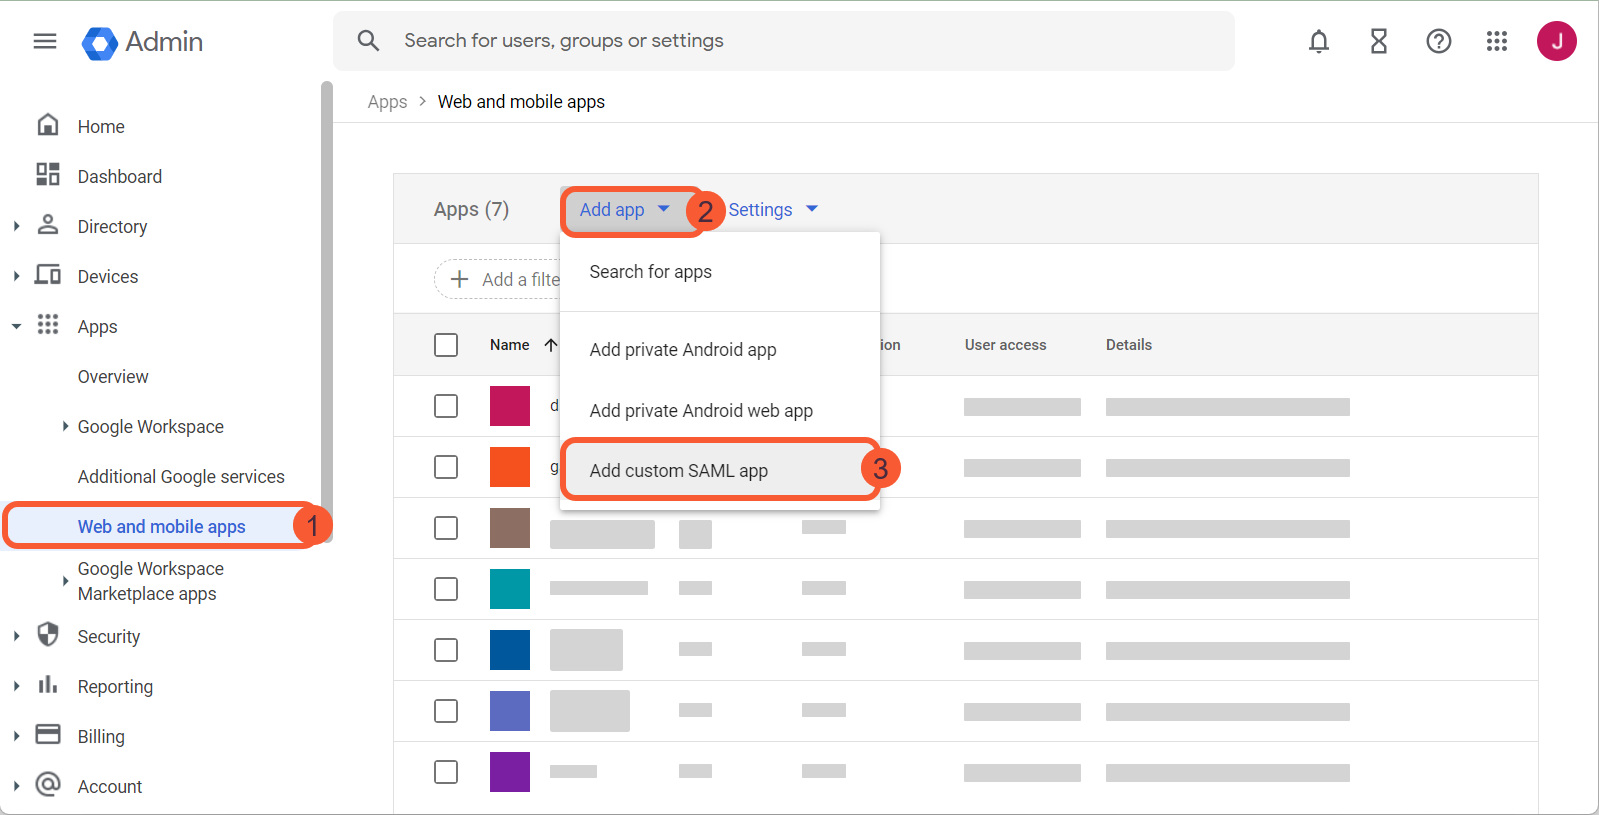
Add Minimus as a custom app in Google
Add custom SAML app in the Google console
- Login to your Google Workspace Admin Console.
- In the left-menu, go to Apps > Web and mobile apps
-
Select the option +Add app >Add custom SAML app
Fill out the general details of your custom app
Fill out the App details:
- Name the application. (We’ll assume the name Minimus App was used for the rest of this guide.)
- (Optional) Add a description.
- (Optional) Upload the Minimus logo to help your team identify the app in their app gallery. (This is not required but highly recommended.)
- Continue to the next step.
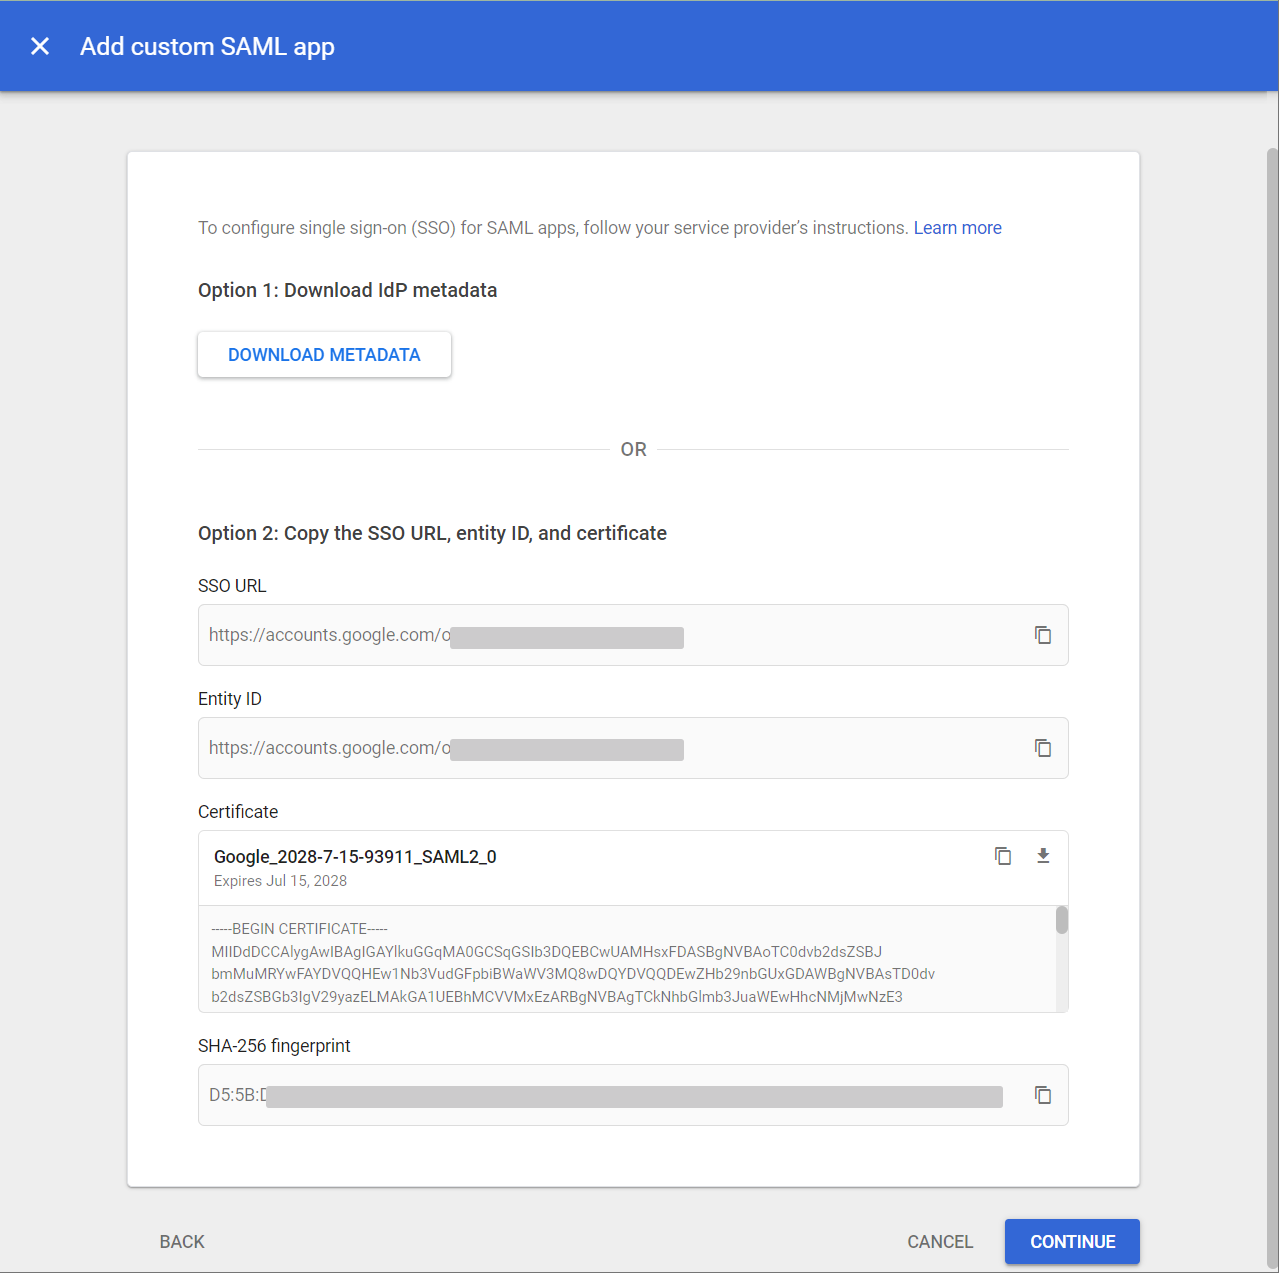
Copy Google metadata to Minimus form
Copy the metadata from Google to Minimus:
- Open the Minimus SSO form in another browser tab. You can use this direct link or navigate as follows: Go to Manage > Users & Groups. Then click Configure SSO at the top of the page.
- Copy the following parameters from Google to Minimus:
| Copy from Google | Paste in Minimus |
|---|---|
| SSO URL | Login URL |
| Entity ID | IdP Entity ID |
| Certificate | Certificate |
You can also download the details if you prefer.
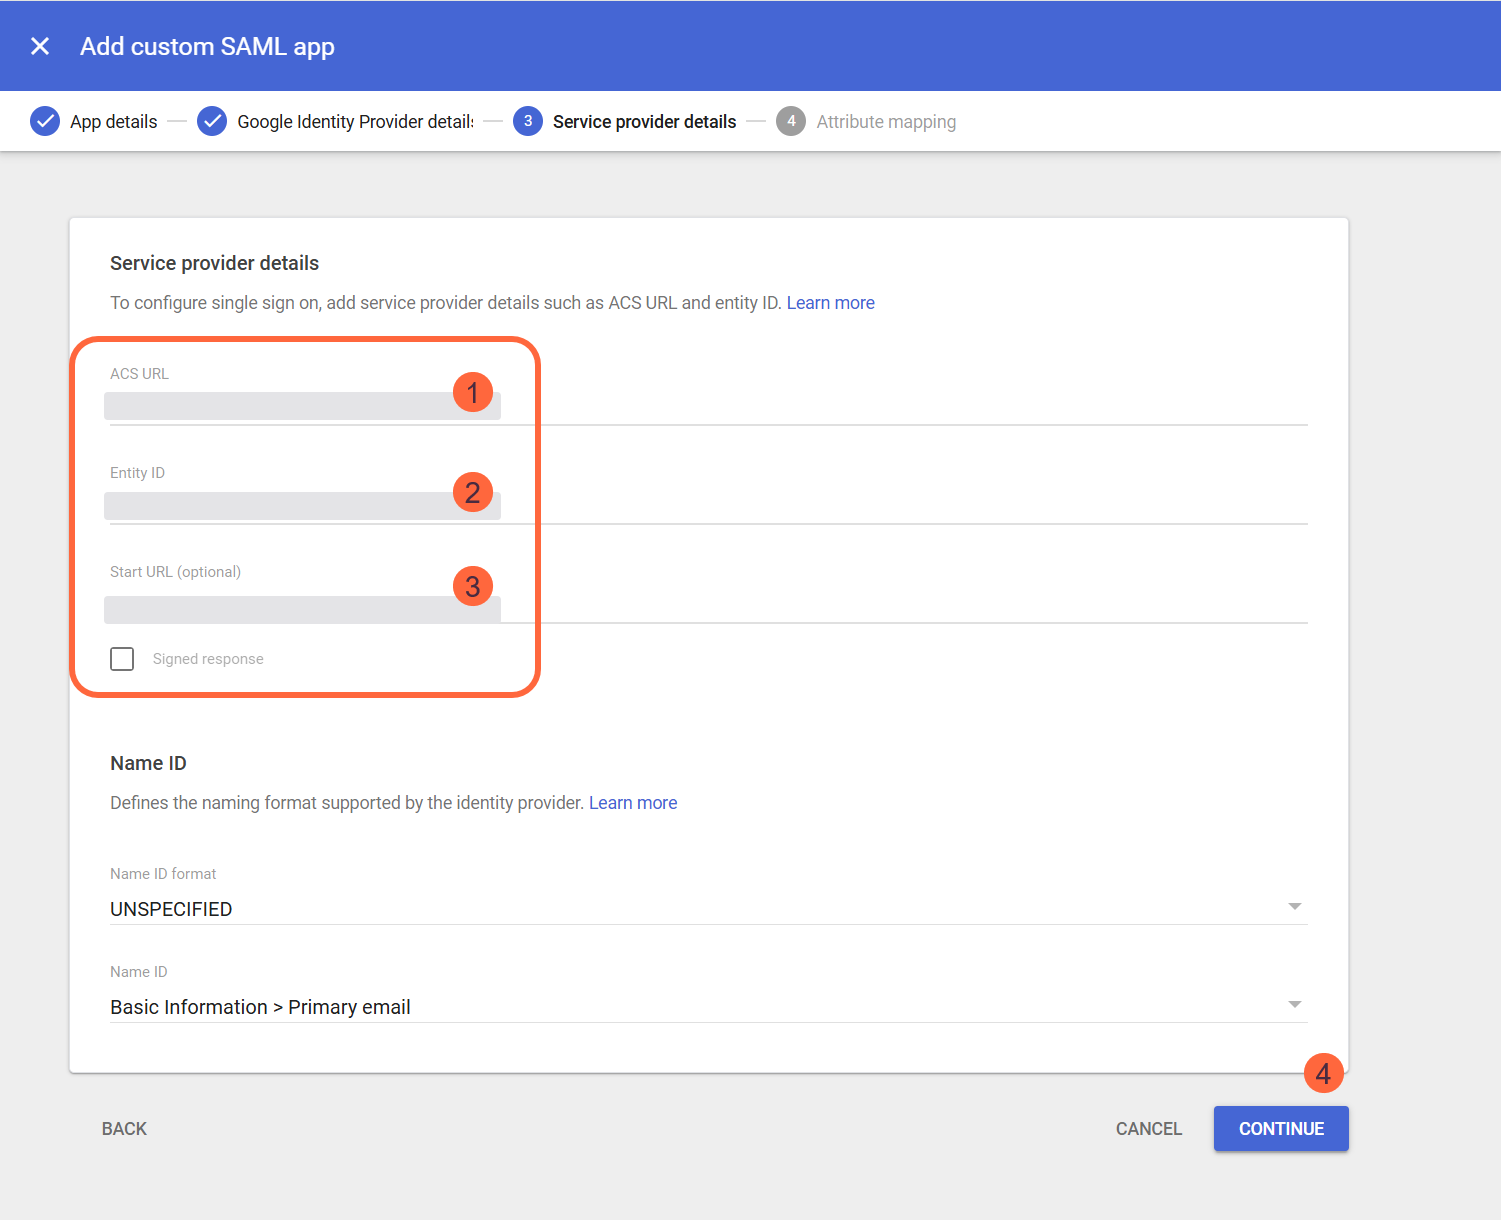
Configure service provider details
-
Copy the following service provider details from Minimus to Google:
Minimus form Google form Notes Reply URL ACS URL - SP Entity ID Entity ID - Relay State Start URL Required to enable users to login via Google apps. If left blank, users will only be able to login with SSO from the Minimus homepage. - Continue to the next step.
Configure attribute mapping in Google
-
Under SAML Attribute mapping, map the Google Directory attributes to the Minimus app attributes:
Google Directory Attribute App attribute Select Primary email from the dropdown list Input emailSelect First name from the dropdown list Input firstName - Select Finish to confirm the configuration.

Fill out SAML Attribute Mapping in Minimus
Back in the Minimus SAML form, fill out the following under Step 3: SAML Attribute Mapping:
If you plan to use groups, enable Step 4: Group Mapping. This step is optional. It is only relevant if you intend to configure group roles.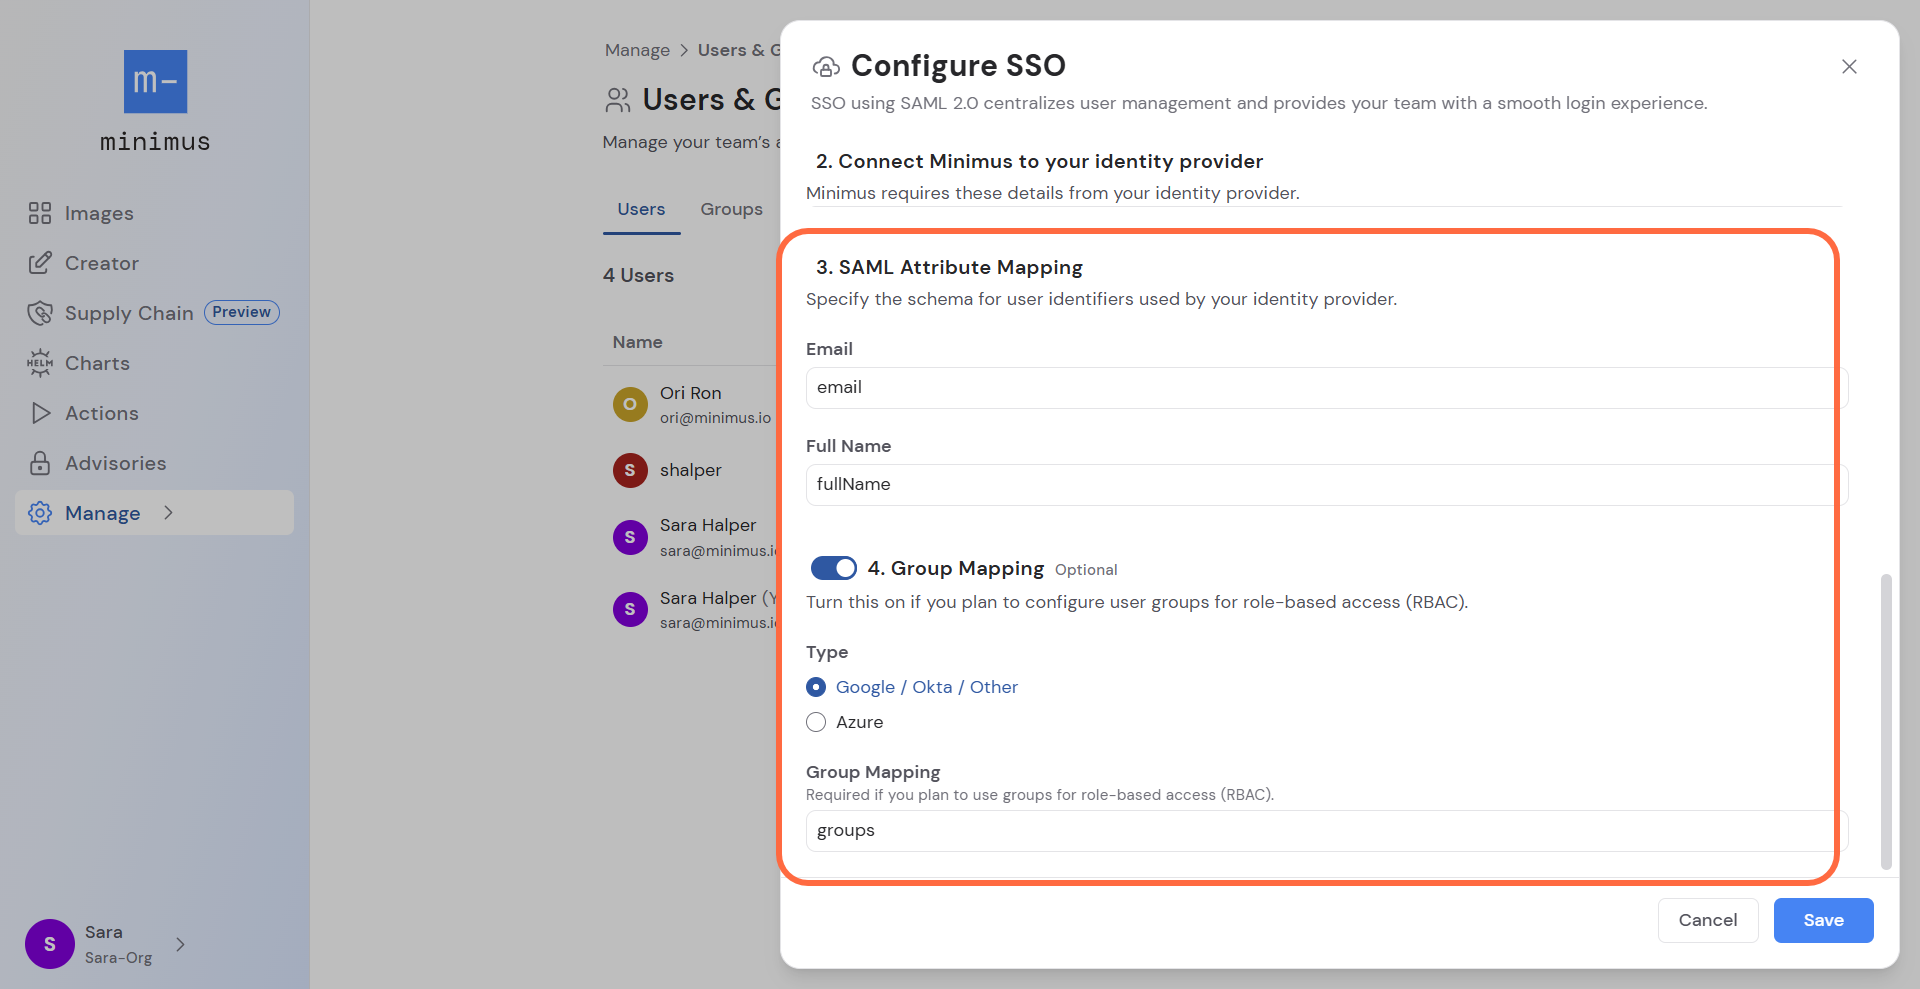
| Minimus Parameter | Input to type in |
|---|---|
| Full name | fullName |
- Type: Google / Okta / Other (This should already be selected by default).
- Group Mapping: Type in
groupsto match the attribute expression from the previous step.
Turn on access to the Minimus App
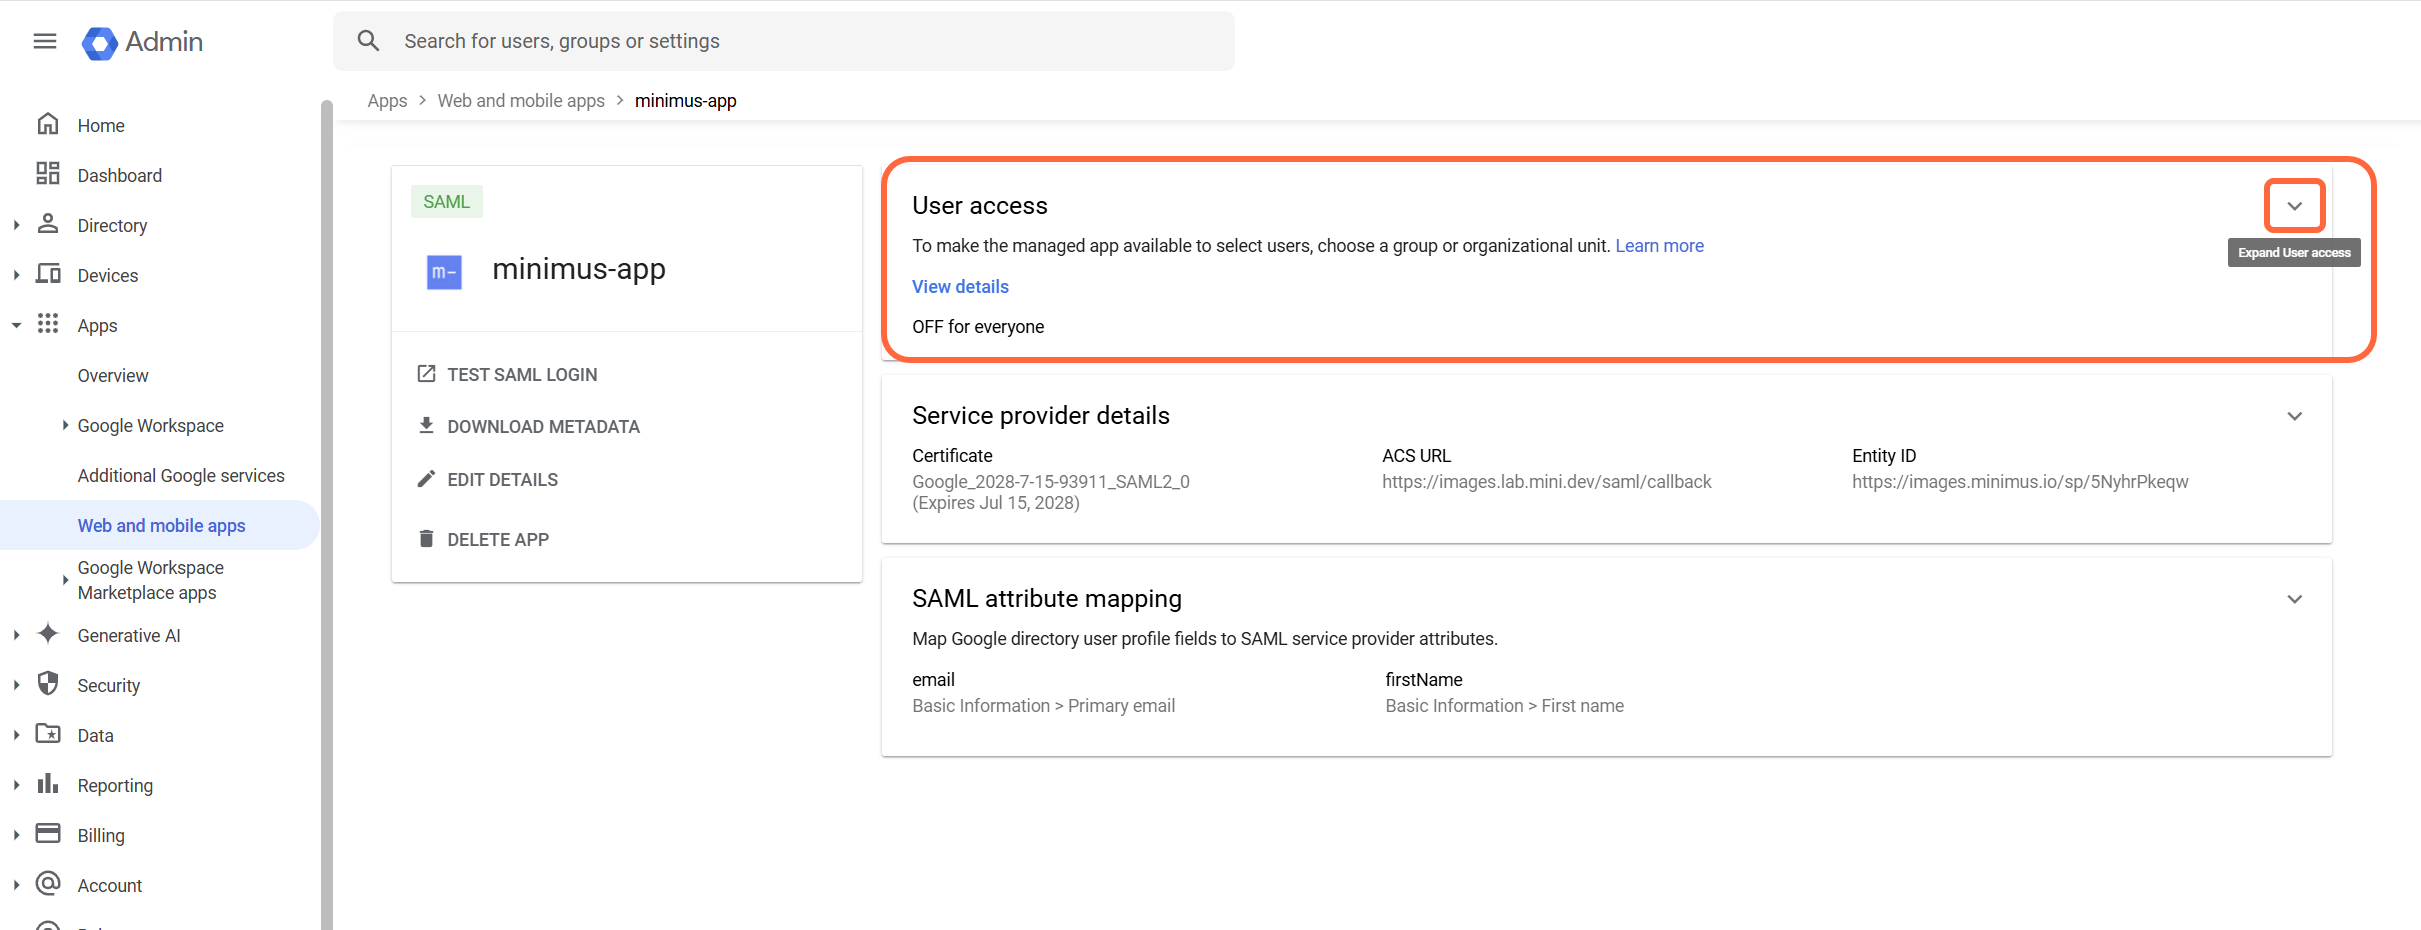
In Google Workspace, user access is turned off by default for newly-added apps. Here’s how to turn it on.- Login to your Google Workspace Admin Console.
- In the left-menu, go to Apps > Web and mobile apps.
- Select the Minimus App from the list.
-
Expand the User Access window.
-
Select the state ON for everyone.
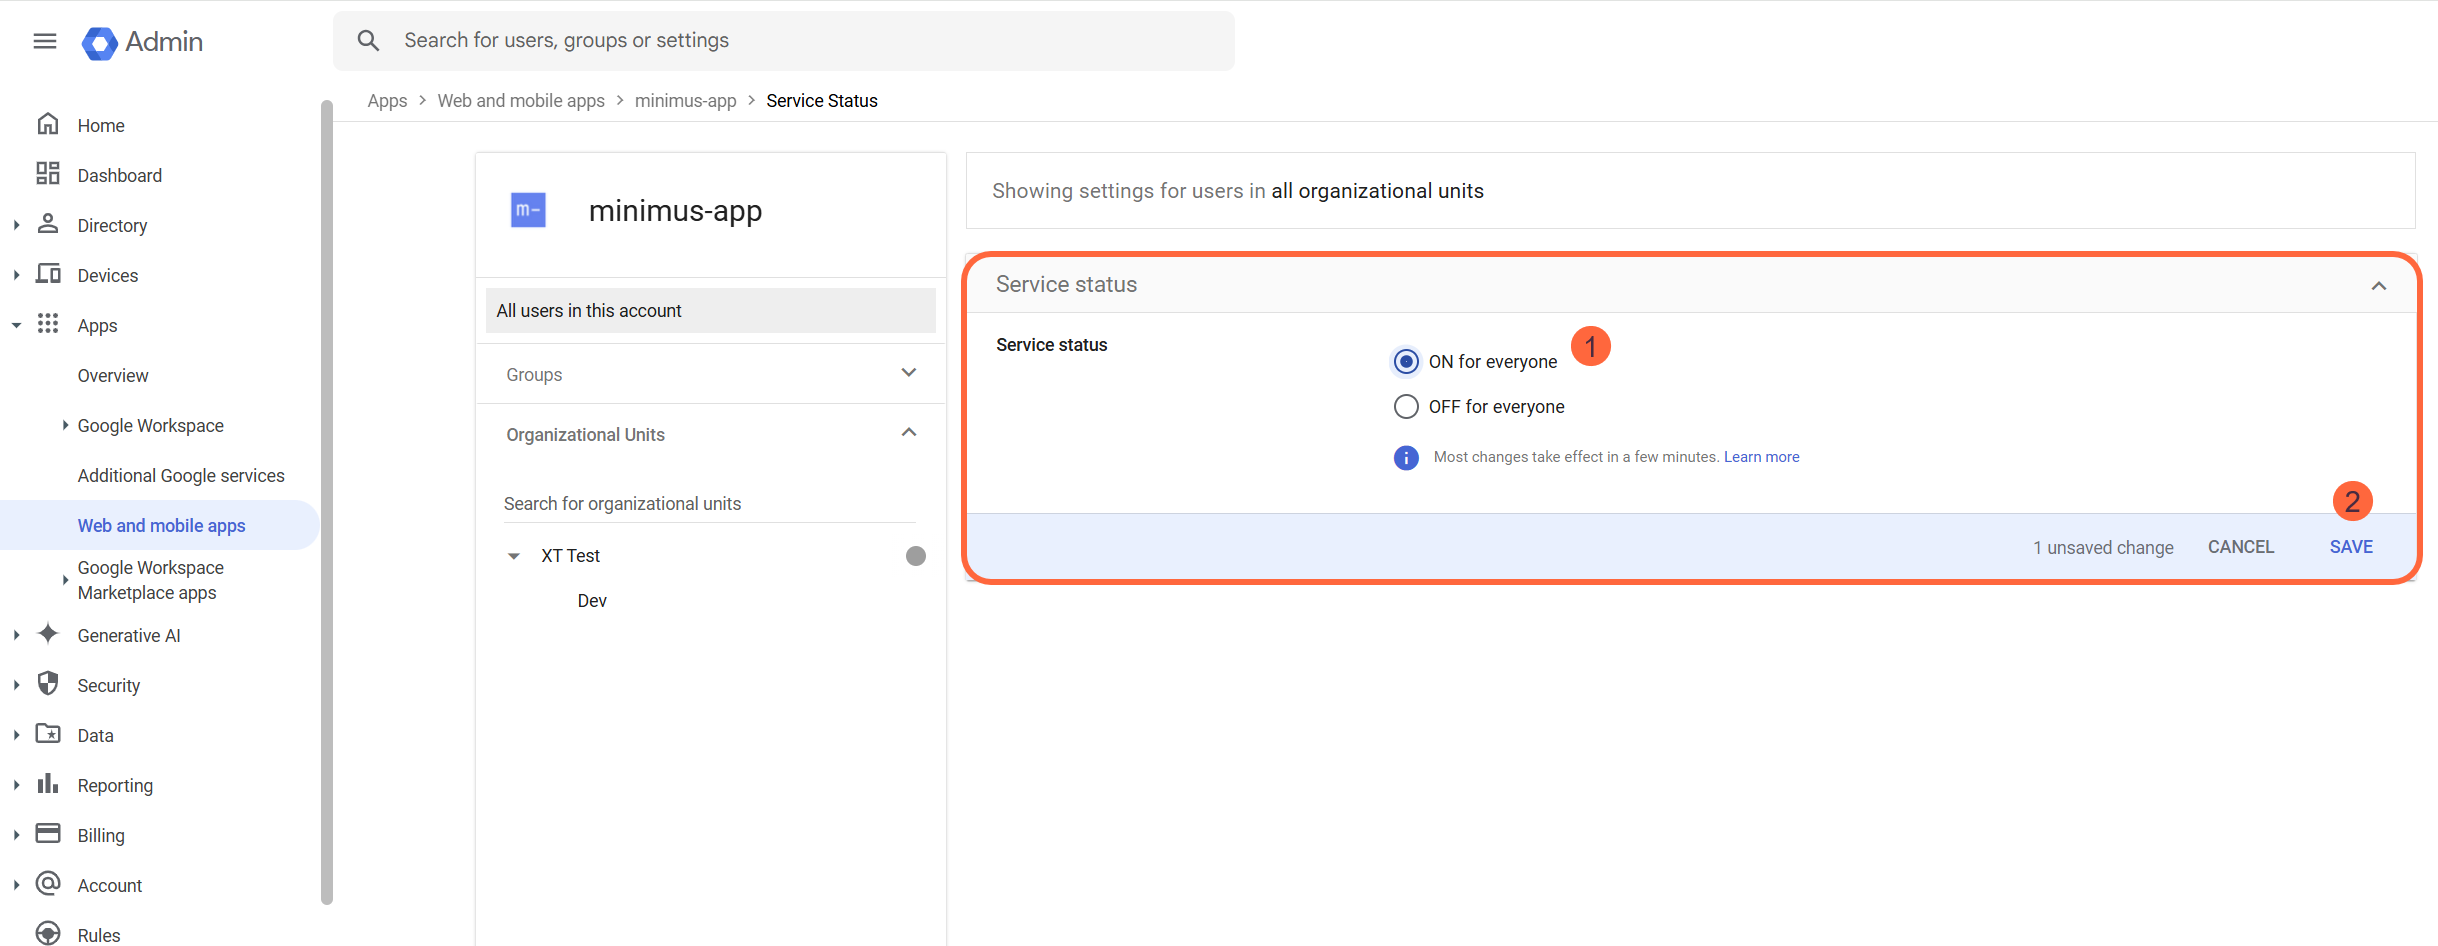
- Save the changes. That’s it. You’re all set.