Prepare the SSO form in Minimus
- Go to Manage > Users & Groups (direct link)
- Click Configure SSO at the top of the page to open the Minimus SSO form.
- The form has 4 parts:
- Configure Minimus as a custom app in your identity provider - You will need to copy these parameters from Minimus to Okta in the next steps.
- SP Entity ID
- Reply URL (Callback / ACS URL)
- Relay State (optional) - If you leave the Relay State blank, users will only be able to login with SSO from the Minimus homepage.
- Connect Minimus to your identity provider - You will need to fetch these parameters from your Okta custom app and save them in the Minimus form.
- Login SSO URL
- IdP Entity ID
- Certificate
- SAML Attribute Mapping - You will configure matching attributes in both Okta and Minimus.
- Group Mapping is optional and can be enabled if you plan to configure user groups. See the instructions in user groups.
- Configure Minimus as a custom app in your identity provider - You will need to copy these parameters from Minimus to Okta in the next steps.
Add Minimus as a custom app in Okta
1
Create a Minimus application in Okta
- Login to your Okta Admin Console.
- Create a new SAML application:
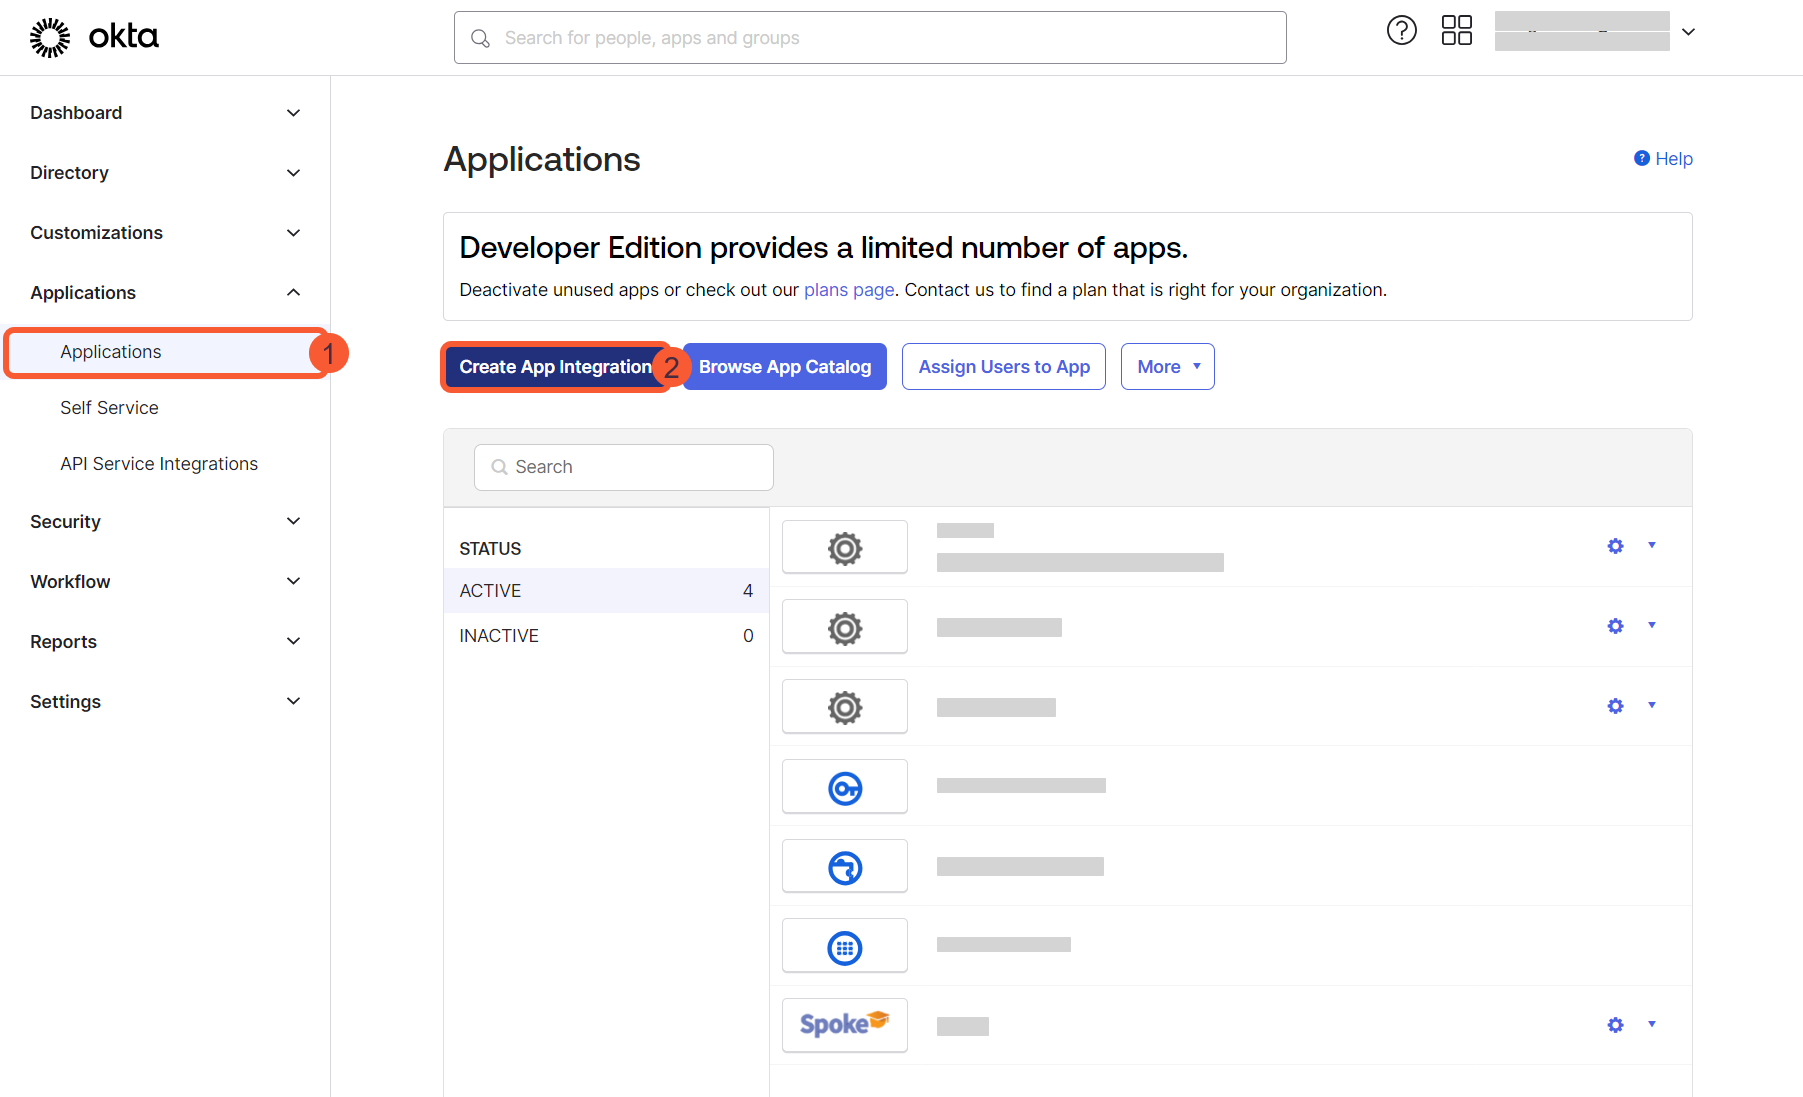
- In the left-menu, go to Applications > Applications.
- Select the option Create App Integration.
- Select SAML 2.0 as the sign-in method.
2
Configure the general settings
- Fill out the General Settings:
- Name the application. (We’ll assume the name Minimus App was used for the rest of this guide.)
- Upload the Minimus logo to help your team identify the app in their app gallery. (This is not required but highly recommended.)
- Click Next.
3
Configure app parameters in Okta

- Open the Minimus SSO form in another browser tab. You can use this direct link or navigate as follows: Go to Manage > Users & Groups. Then click Configure SSO at the top of the page.
- Copy the following parameters from the Minimus app to Okta. Note that the order of the parameters is different in the apps. The fields are shown according to their order in the Okta form:
- Fill out the rest of the fields in the Okta form:
- Name ID Format - Select EmailAddress from the dropdown list.
- Application Username - Select Email from the dropdown list.
- Update application username on - Leave the default. (It should be Create and update).
4
Configure attribute statements in Okta
Still in the same Okta tab, scroll down to the section Attribute Statements (Optional).
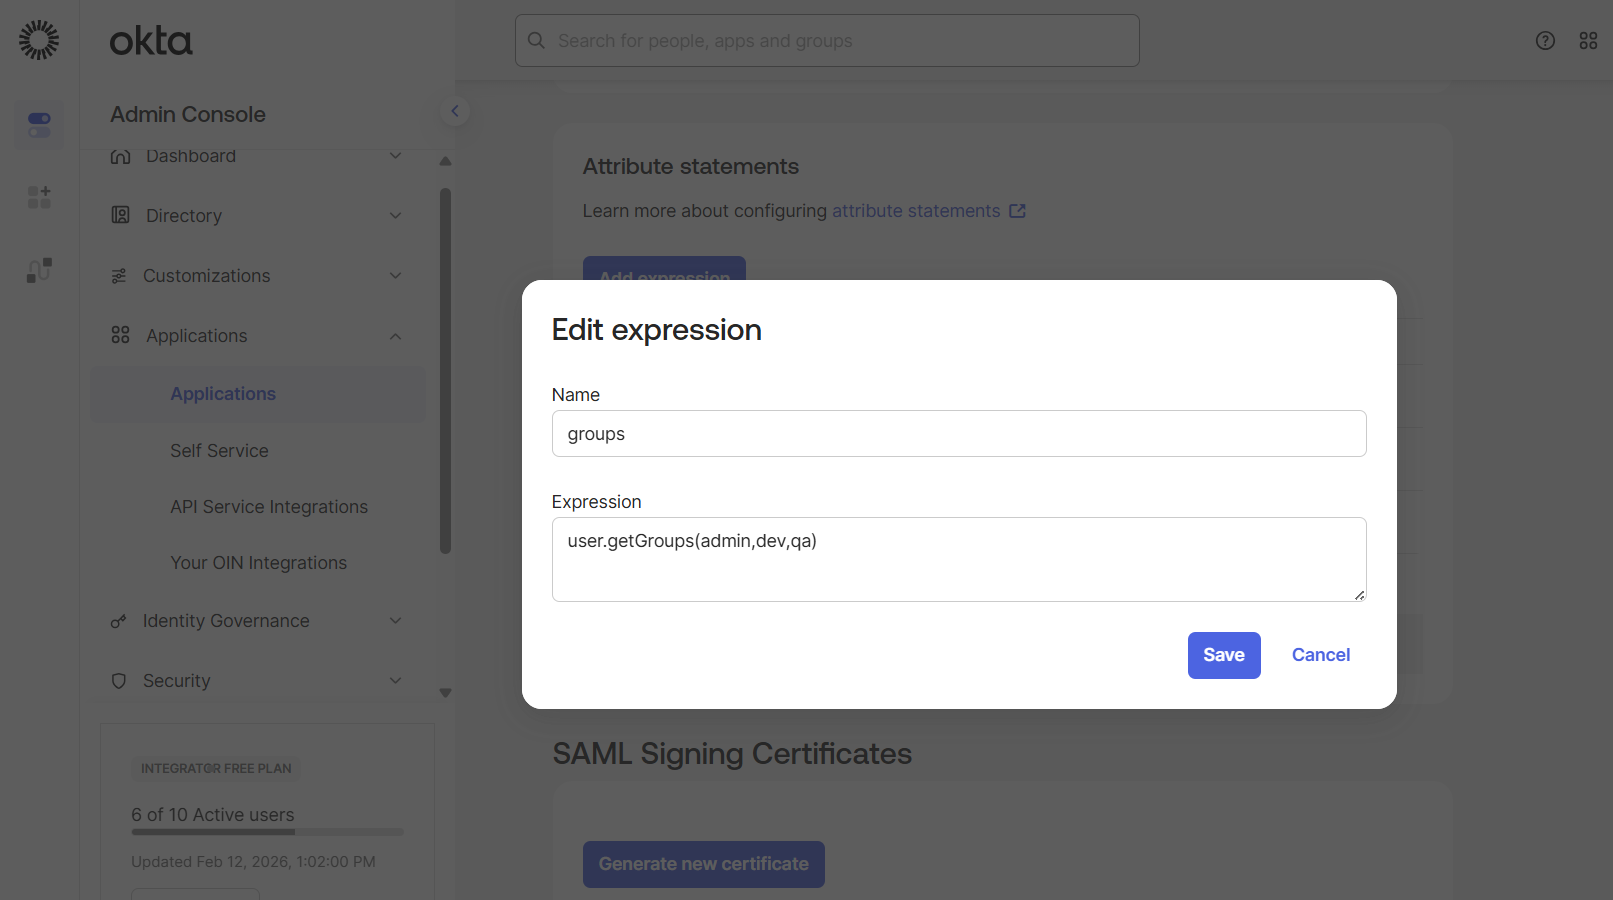
- Select add expression
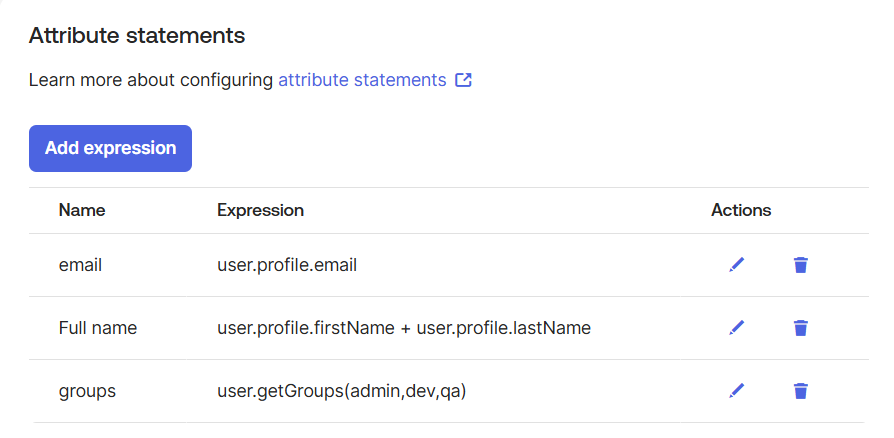
- Add the following 3 expressions:
- Once done, the Okta attribute statements should look like this:
5
Save your custom SAML app
- Click Next to continue.
- Okta will ask for your feedback now that you have configured the custom SAML app.
- Click Finish.
6
Connect the Okta SAML app to Minimus
- In Okta, under your newly created Minimus app:
- Switch tabs to Sign On. (You should be automatically navigated to this tab.)
- Expand More details.
- Copy the following parameters from Okta to Minimus. Note that the order of the parameters is different in the apps. The fields are shown according to their order in the Okta form:
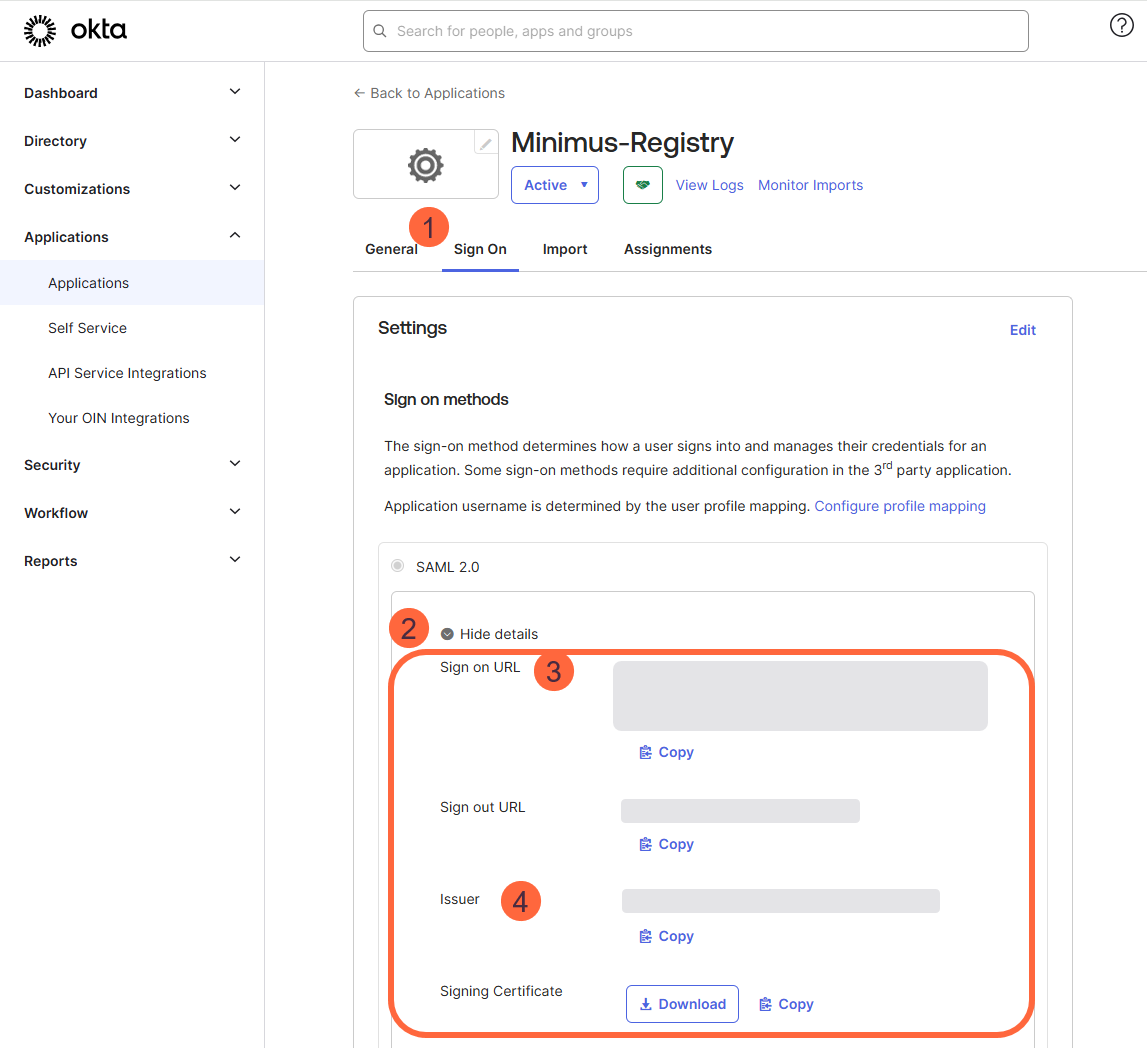
7
Download Base64 Certificate
- Still on the same screen, download the signing certificate from Okta to Minimus.
- Open the certificate in notepad or another code viewer, and copy the code (including `-----BEGIN CERTIFICATE… and …END CERTIFICATE-----`).
- Copy the certificate to the Minimus form.
8
Fill out SAML Attribute Mapping in Minimus
Back in the Minimus SAML form, fill out the following under Step 3: SAML Attribute Mapping: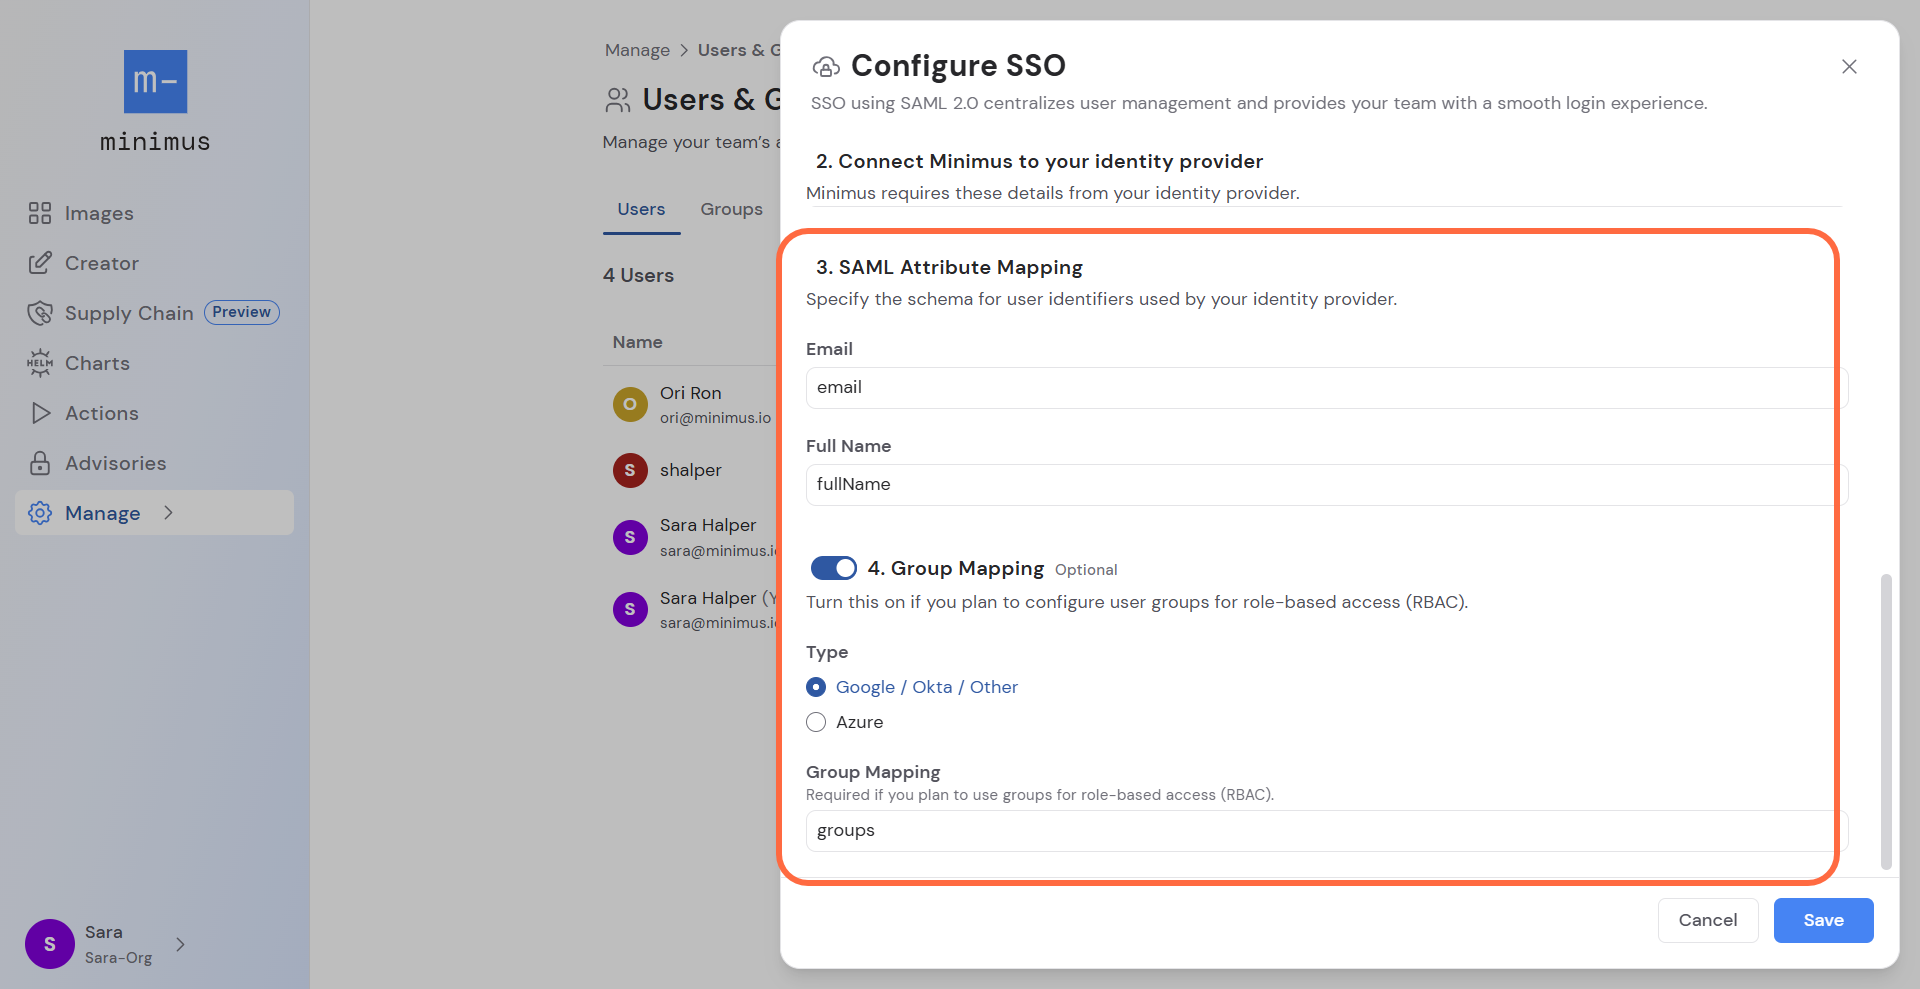
If you plan to use groups, enable Step 4: Group Mapping. This step is optional. It is only relevant if you intend to configure group roles.
- Type: Google / Okta / Other (This should already be selected by default).
- Group Mapping: Type in
groupsto match the Okta attribute expression from a previous step.
9
Save the Minimus SSO form
You are now ready to save the SSO configuration form in Minimus.
Assign access in Okta
Grant Okta groups and/or users access to Minimus.- Login to your Okta Admin Console.
- In the left-menu, go to Applications > Applications.
- Select your Minimus App to open its details.
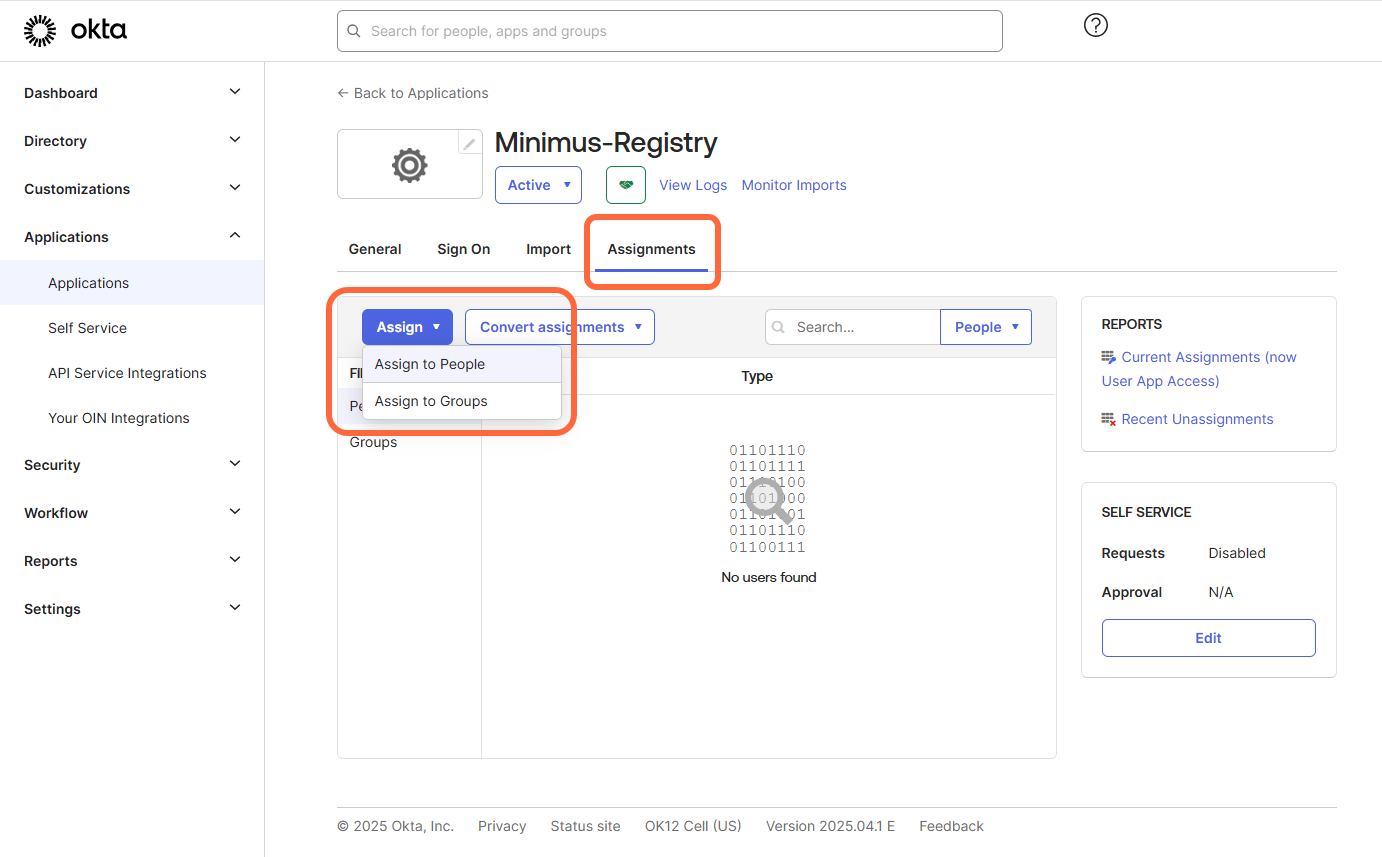
- Select the Assignments tab.
- Select Assign > Assign to people / groups and follow the instructions on the page.