Prerequisites
- JFrog Artifactory administrative privileges with an Artifactory instance
- Access to Docker or Podman to execute an image pull. This may be done locally or from a virtual machine that has a routable network path to your Artifactory instance.
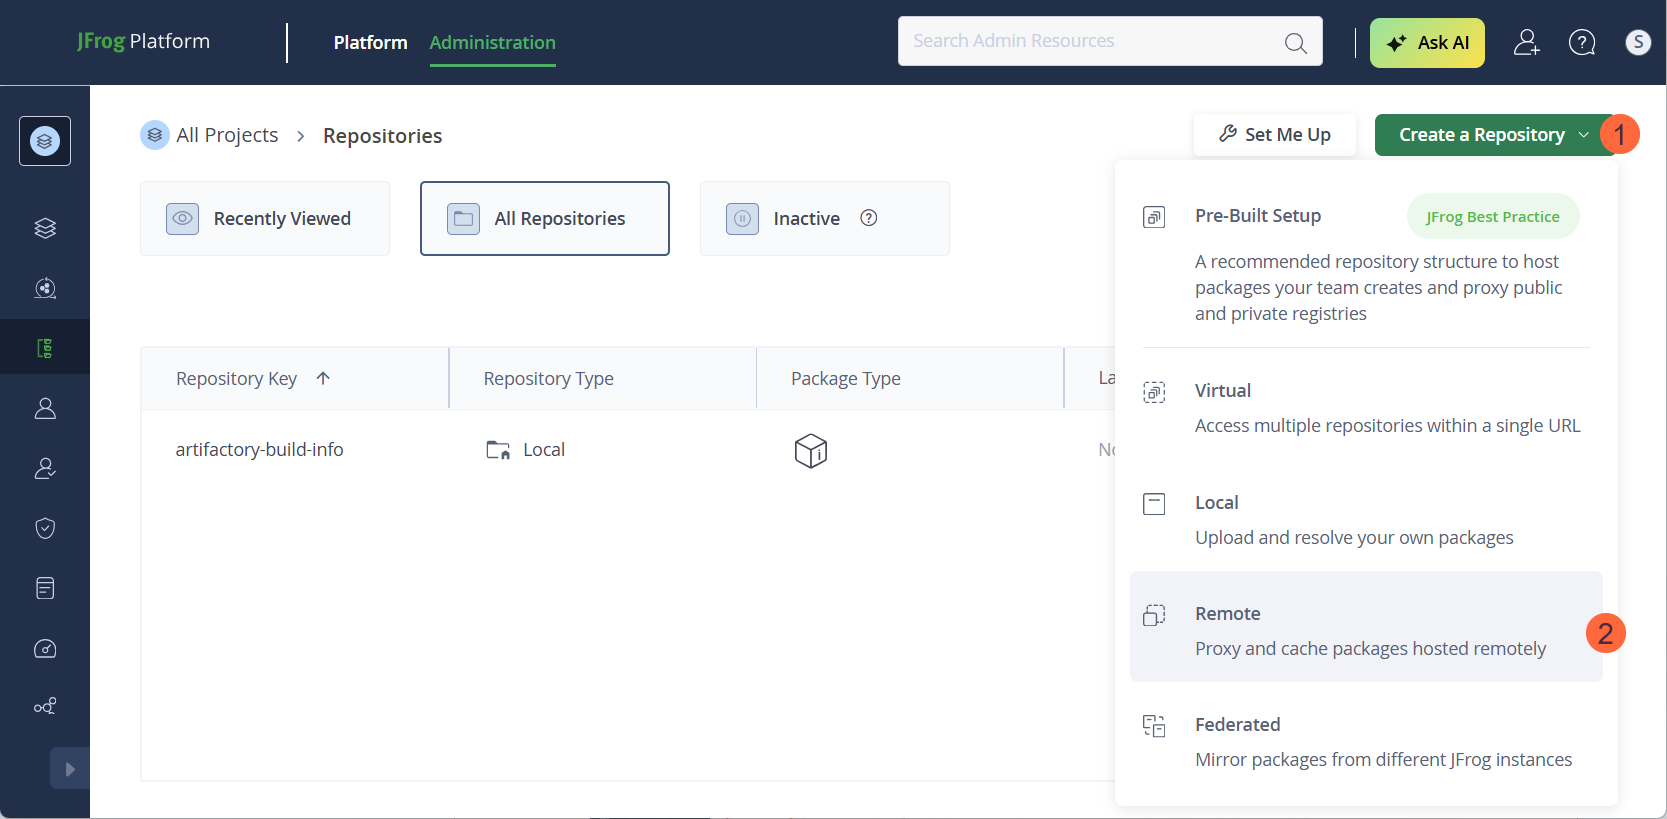
Set up a remote repository in Artifactory
In this step, we will set up the Minimus registry as a remote repository in JFrog Artifactory to enable pull through.- Log into your JFrog Artifactory console.
- Navigate to Administration > Repositories (The URL will look like this
https://***.jfrog.io/ui/admin/repositories). - Select Create a Repository > Remote.
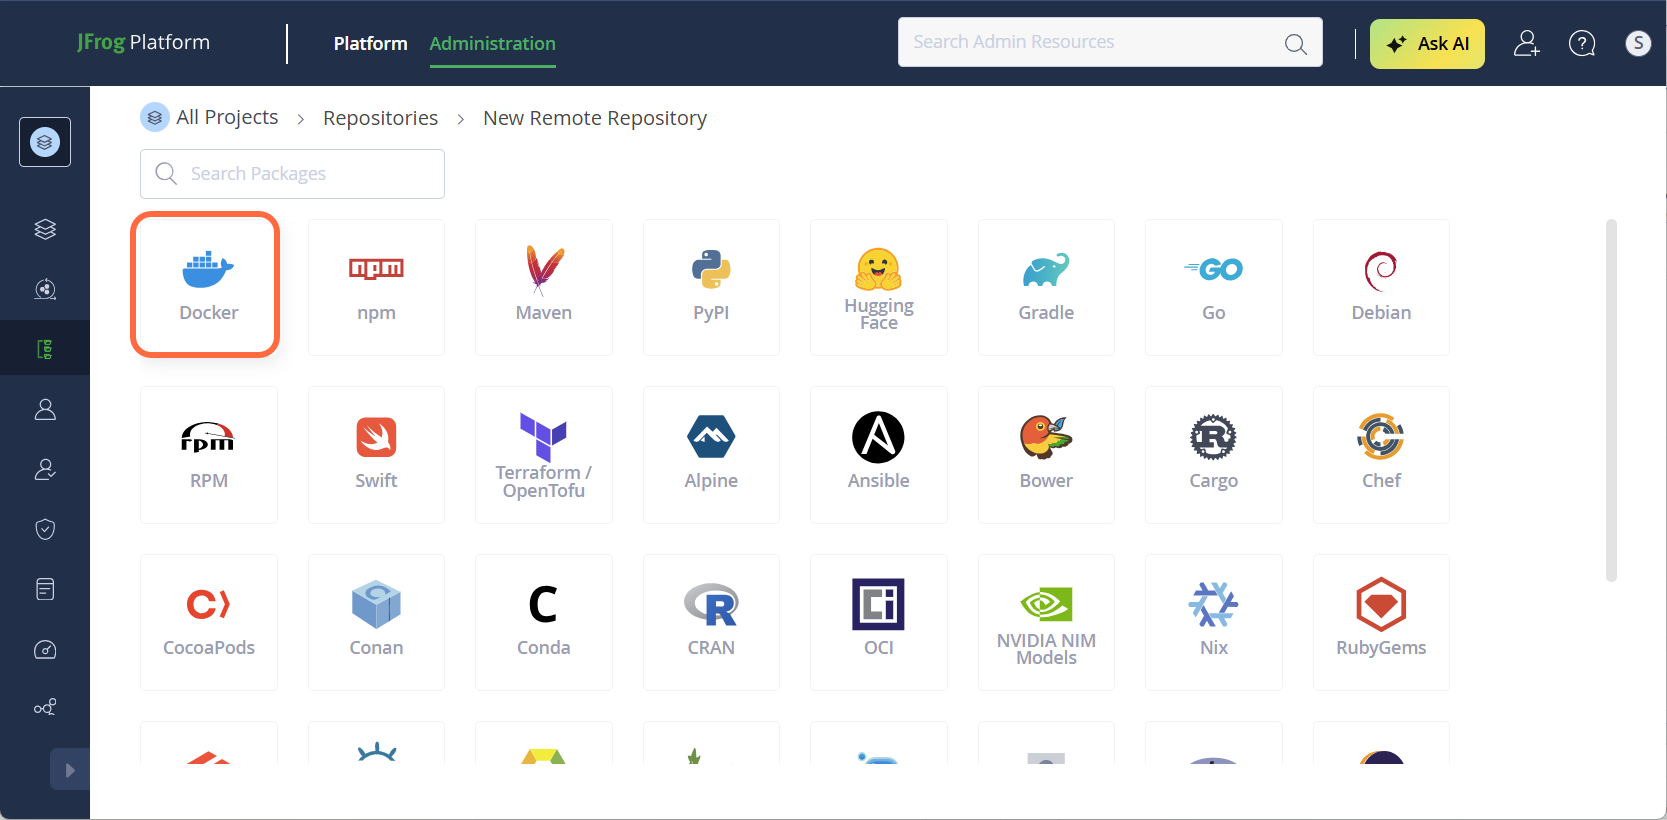
- Select Docker.
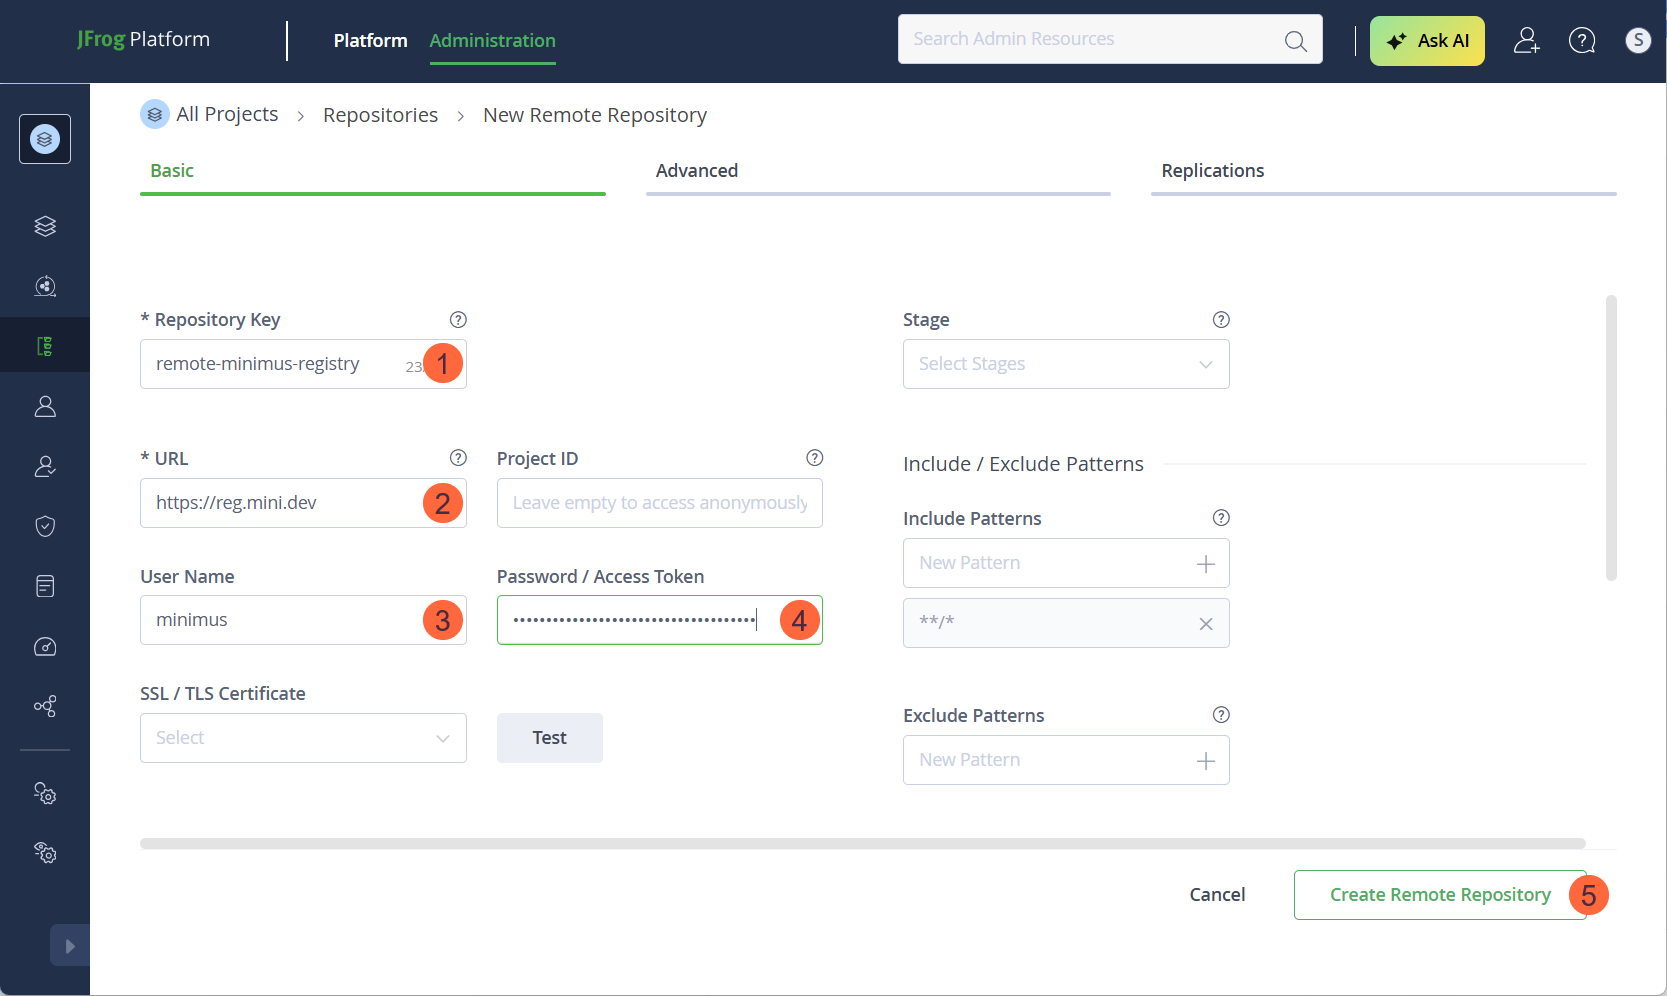
- Fill in the form:
- Repository Key: Name your remote-repository, for example,
remote-minimus-registry. - URL: Type in
https://reg.mini.dev. - User Name: Type in
minimus(The username for authenticating to the Minimus registry) - Password / Access Token: Paste your Minimus token as the value. (You can use this direct link to fetch your Minimus token).
- For all other fields, you can keep the defaults but we recommend that you align with your organizational policies.
- Click Create Remote Repository to complete the form.
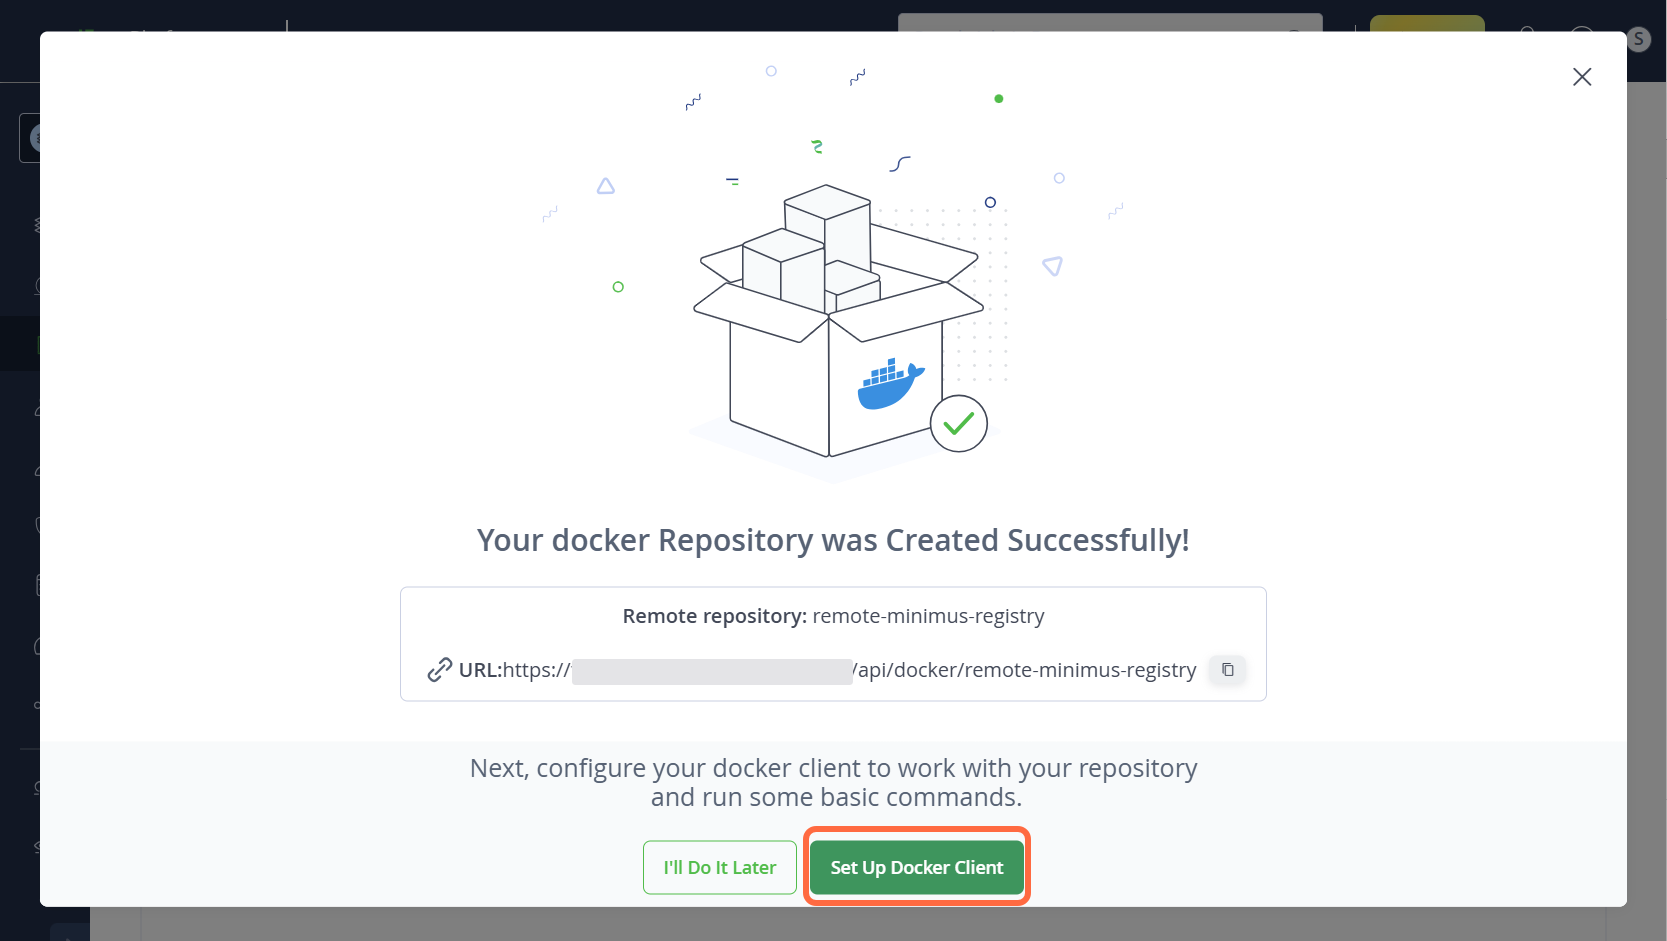
- You should see the following success window. Select the option Set Up Docker Client to continue.
- Repository Key: Name your remote-repository, for example,
Pulling Minimus images into Artifactory
Now that you’ve set up the Minimus registry as a remote repository in Artifactory, you are ready to pull Minimus images into your JFrog Artifactory instance.-
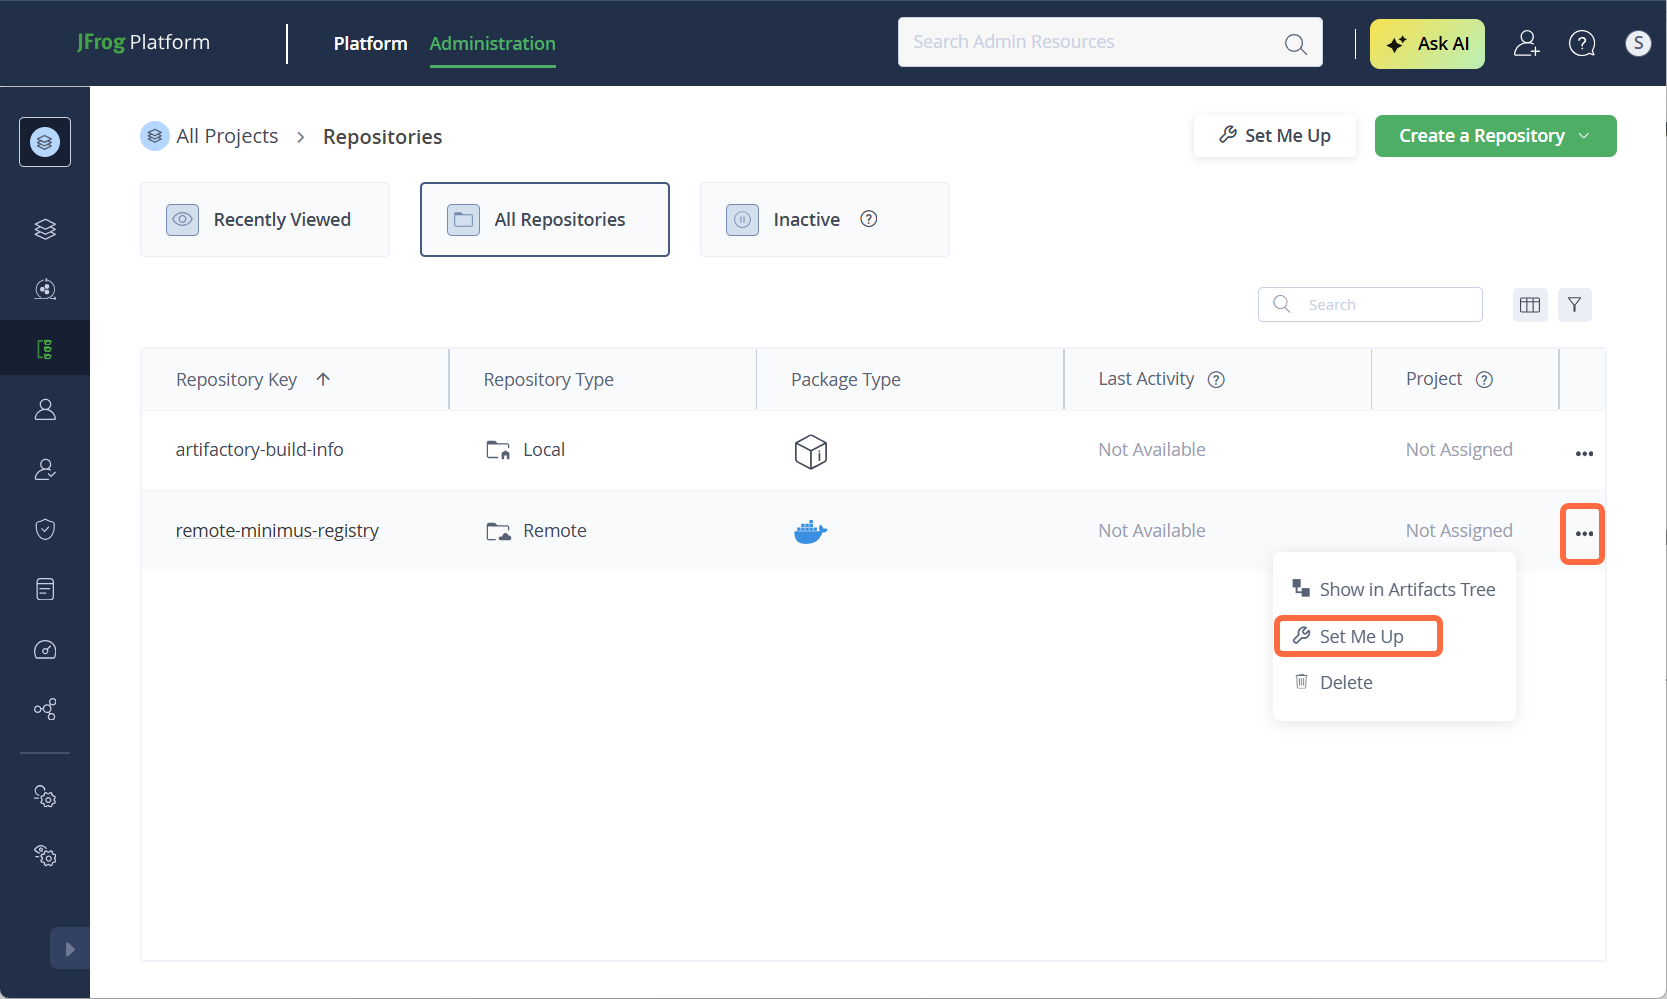
If you didn’t select Set Up Docker Client in the previous step, you can navigate to it directly:
- Select Repositories from the left menu.
- Hover over your repository, click the right menu (3 dots), and select Set Me Up.
-
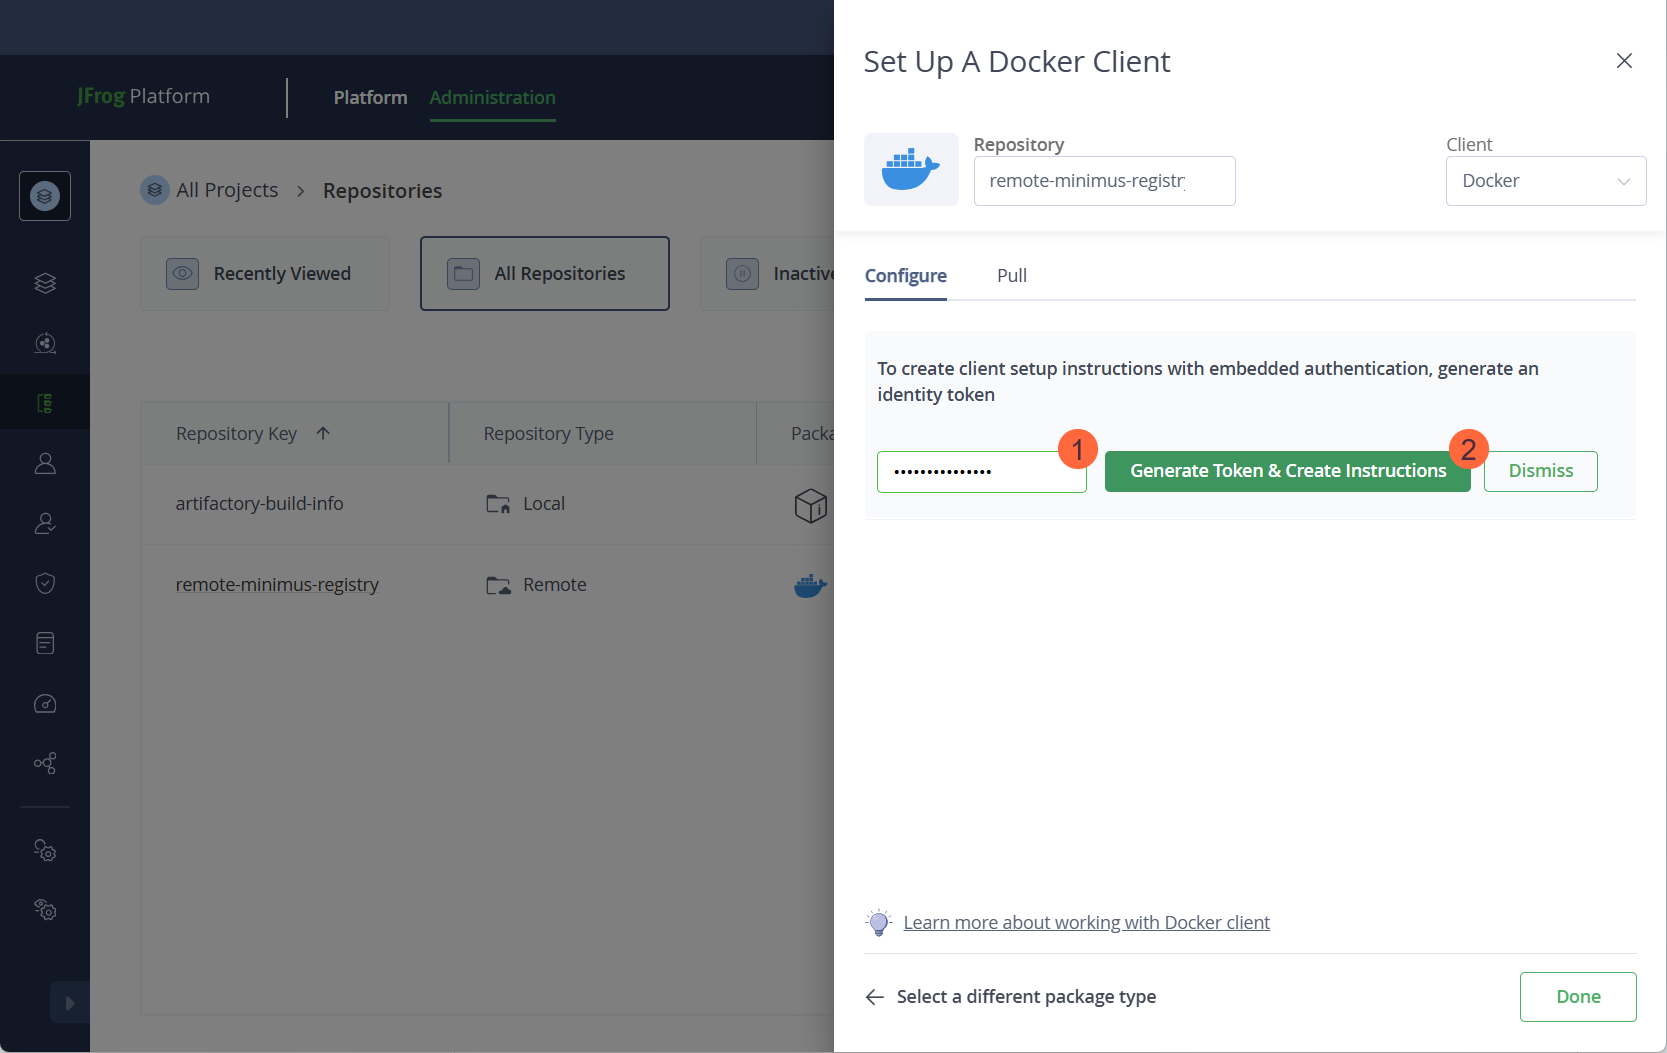
Authenticate to the remote registry.
- Enter your Artifactory tenant password.
- Select Generate Token & Create Instructions.
-
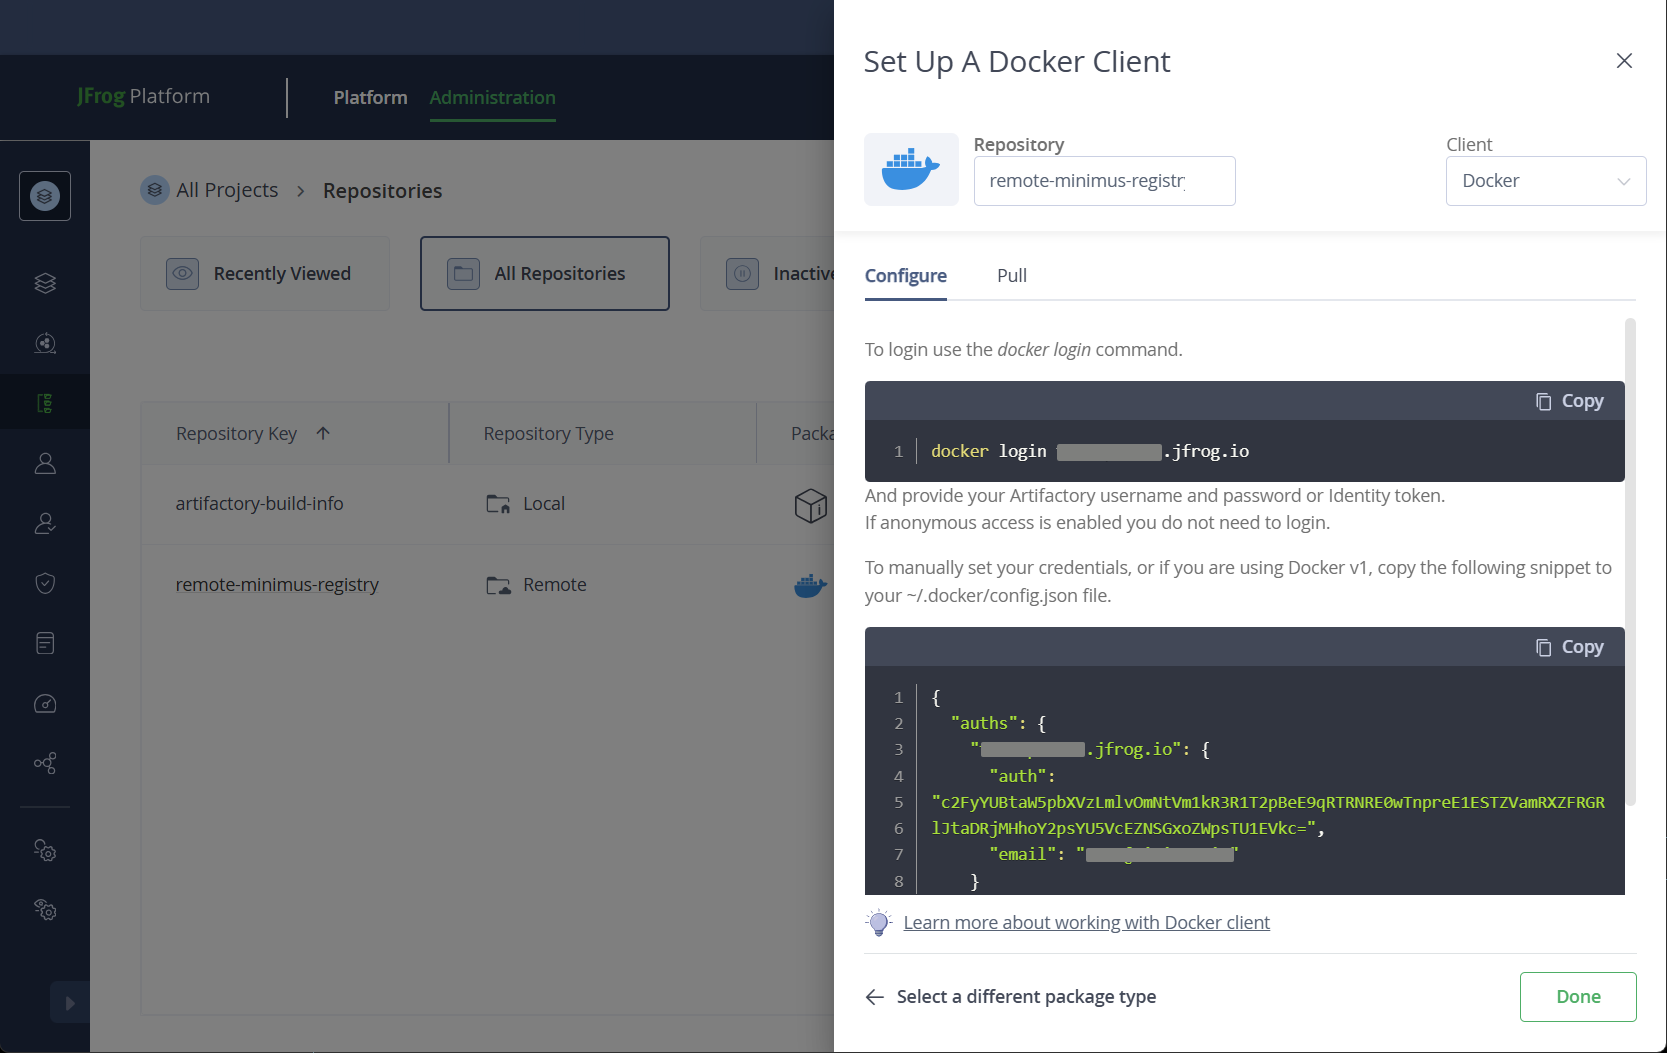
The instructions and commands will be provided in the JFrog UI.
-
In your CLI, log in to your JFrog instance, for example:
-
Execute a Docker or Podman pull command:
- That’s it! You have validated that you can pull a Minimus image into your JFrog Artifactory repository.