Creating a private image
Select your starter image
Select any image from your Minimus subscription to begin. Only images listed in your Minimus subscription will be shown.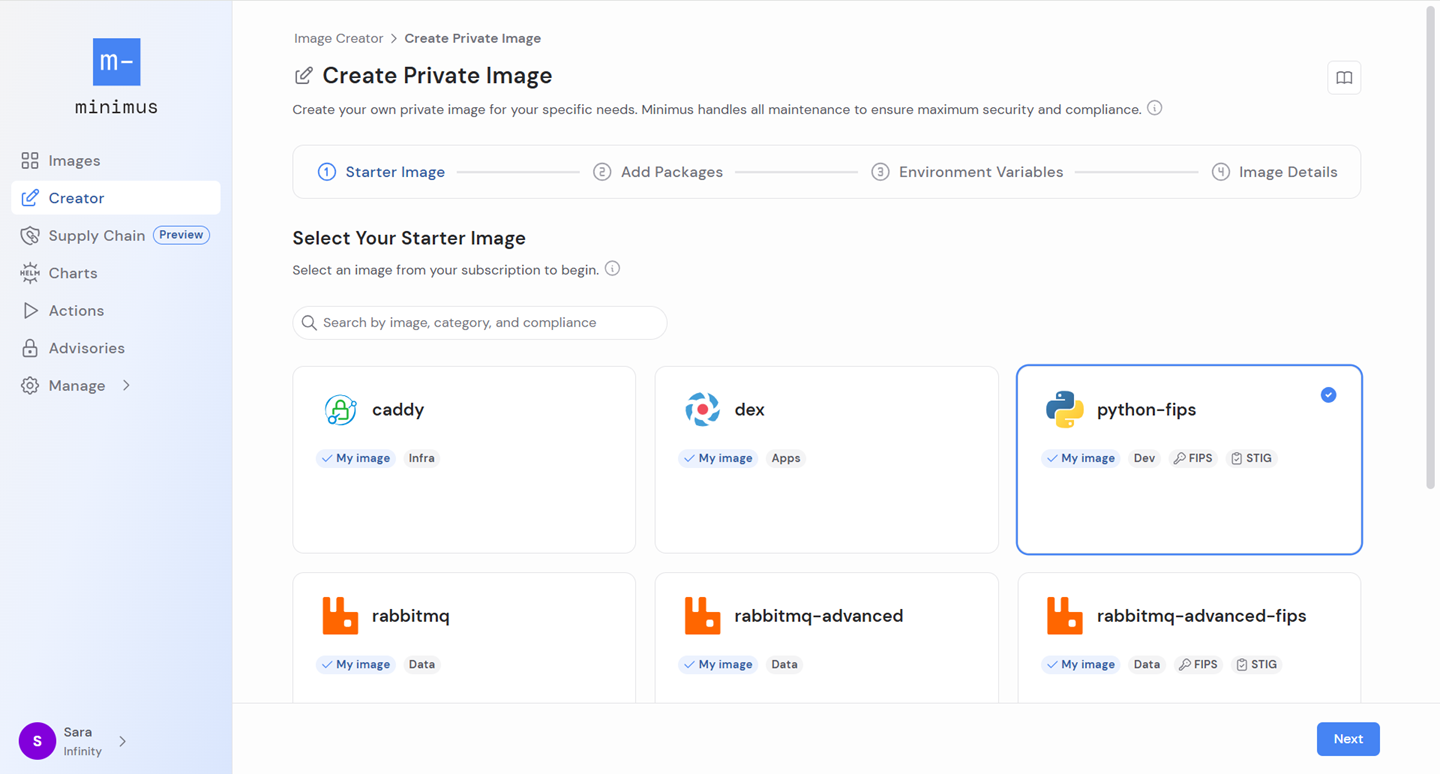
Select packages to add
You can add any number of packages to your starter image. All packages maintained in the Minimus package repository are available, including the Minimus Cryptographic Module for FIPS images. The recommended process is as follows: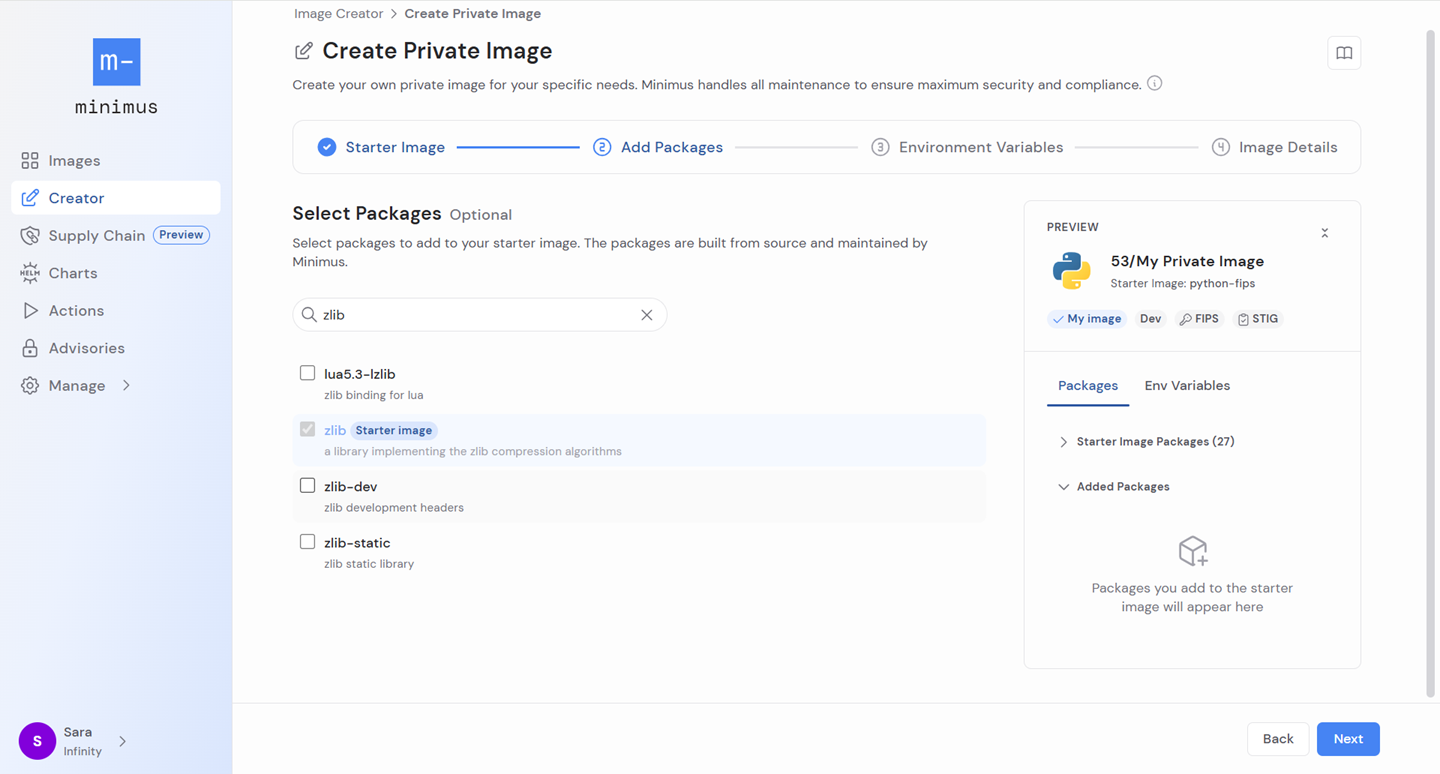
- Review the SBOM of your starter image - expand the folder starter image packages in the right preview panel.
-
Search the list of available add-on packages by name, description or version. For Python and PHP packages, you can select
autopackages for Minimus to automatically pair versions and ensure package version compatibility. Learn more - Select packages to add them.
- Review the added packages in the right preview panel under the folder added packages.
- In the right-panel preview, fine-tune your selection and remove packages, as needed.
Add custom environment variables
You can add custom env variables (short for environment variables) to pass configuration settings into the container at runtime without hardcoding them in the image. These may include ports, credentials, modes, etc.
- Avoid duplicate keys as they will cause the build to fail. This is to protect against overrides that can interfere with the starter image configurations.
- You can add key-value pairs. Key-only variables (also, empty environment variables) are not accepted.
- Once you make your updates, your custom env variables are shown in the right preview panel, where you can review them and remove them if needed.
Upload file bundles
You can upload a new file bundle or add an existing file bundle from the file repository. File bundles are used to include public keys for internal PKIs (Public Key Infrastructure certificates), override default configuration files, and more.
- Once you add your file bundles, they will be shown in the right preview panel for review.
- Learn more about managing your file bundles
Set image details
The next step is to give your private image a name and optionally, provide a description. Your organization’s tenant ID will be prepended to the image name to clearly indicate that it is private to your organization. Your image will also be marked with the label private image.Read the testing recommendations then save your image.
Wait for the image to be built
While the image is being built, its card will be shown in the Image Creator gallery with a status label - in progress. The build generally takes under 15 minutes, depending on the components.When the image is ready, it will appear with the label created and will show a timestamp of when it was first created. Click the button view image to dive into the image card.
Test your private image
Testing your private image for functionality is the next step. Minimus standard images undergo strict unit testing as described in our architecture article. Since testing is particular to the exact components of the image, Minimus is not able to cover all testing requirements for private images.
Package compatibility in private images
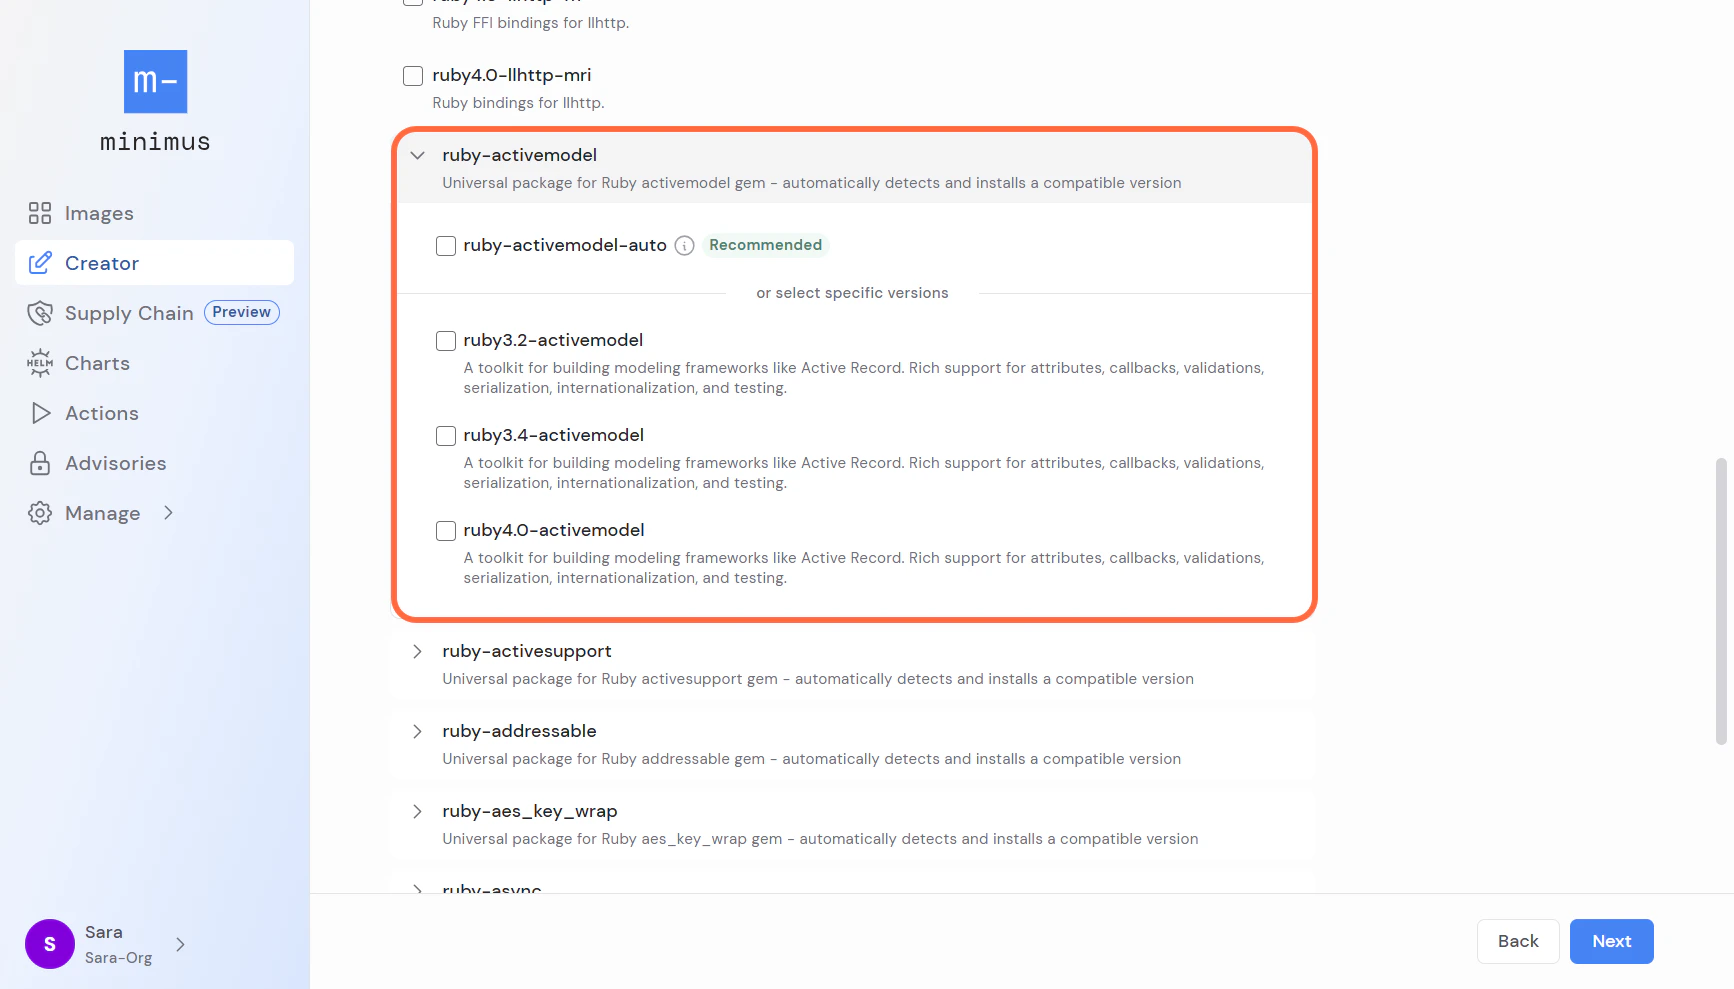
Auto-versioning packages for Ruby, Python & PHP
Pairing the right package version with the image version can potentially get tricky. To save you the trouble, Minimus offers auto-versioning packages. Auto-versioning packages automatically detect and install a package version compatible with each of the starter image lines during the build of the private image. Minimus currently offers Ruby, Python, and PHP auto-versioning packages. All auto-versioning package names end with the suffix-auto and their description has a fixed format:
- PHP package names:
php-curl-auto,php-openssl-auto,php-zip-auto - Python package names:
py3-rsa-auto,py3-babel-auto,py3-extras-auto - Ruby package names:
ruby-securerandom-auto,ruby-swd-auto,ruby-timeout-auto
Auto-version logic
The general logic of the auto-version packages is as follows:-
If there is no conflict with the starter image, the auto package will select the
latestpackage version for all private image lines. Thelatestversion will progress as new package versions are released. -
If the package is a dependency of another popular package, it will not offer an auto-version since it is not expected to be added directly. For example,
php-posix-configis considered a dependency ofphp-posix-auto. Therefore there is nophp-posix-config-autooption. -
If a version of the package is already in use, the entire package family will be blocked. The package version used by the starter image’s
latestline will be indicated.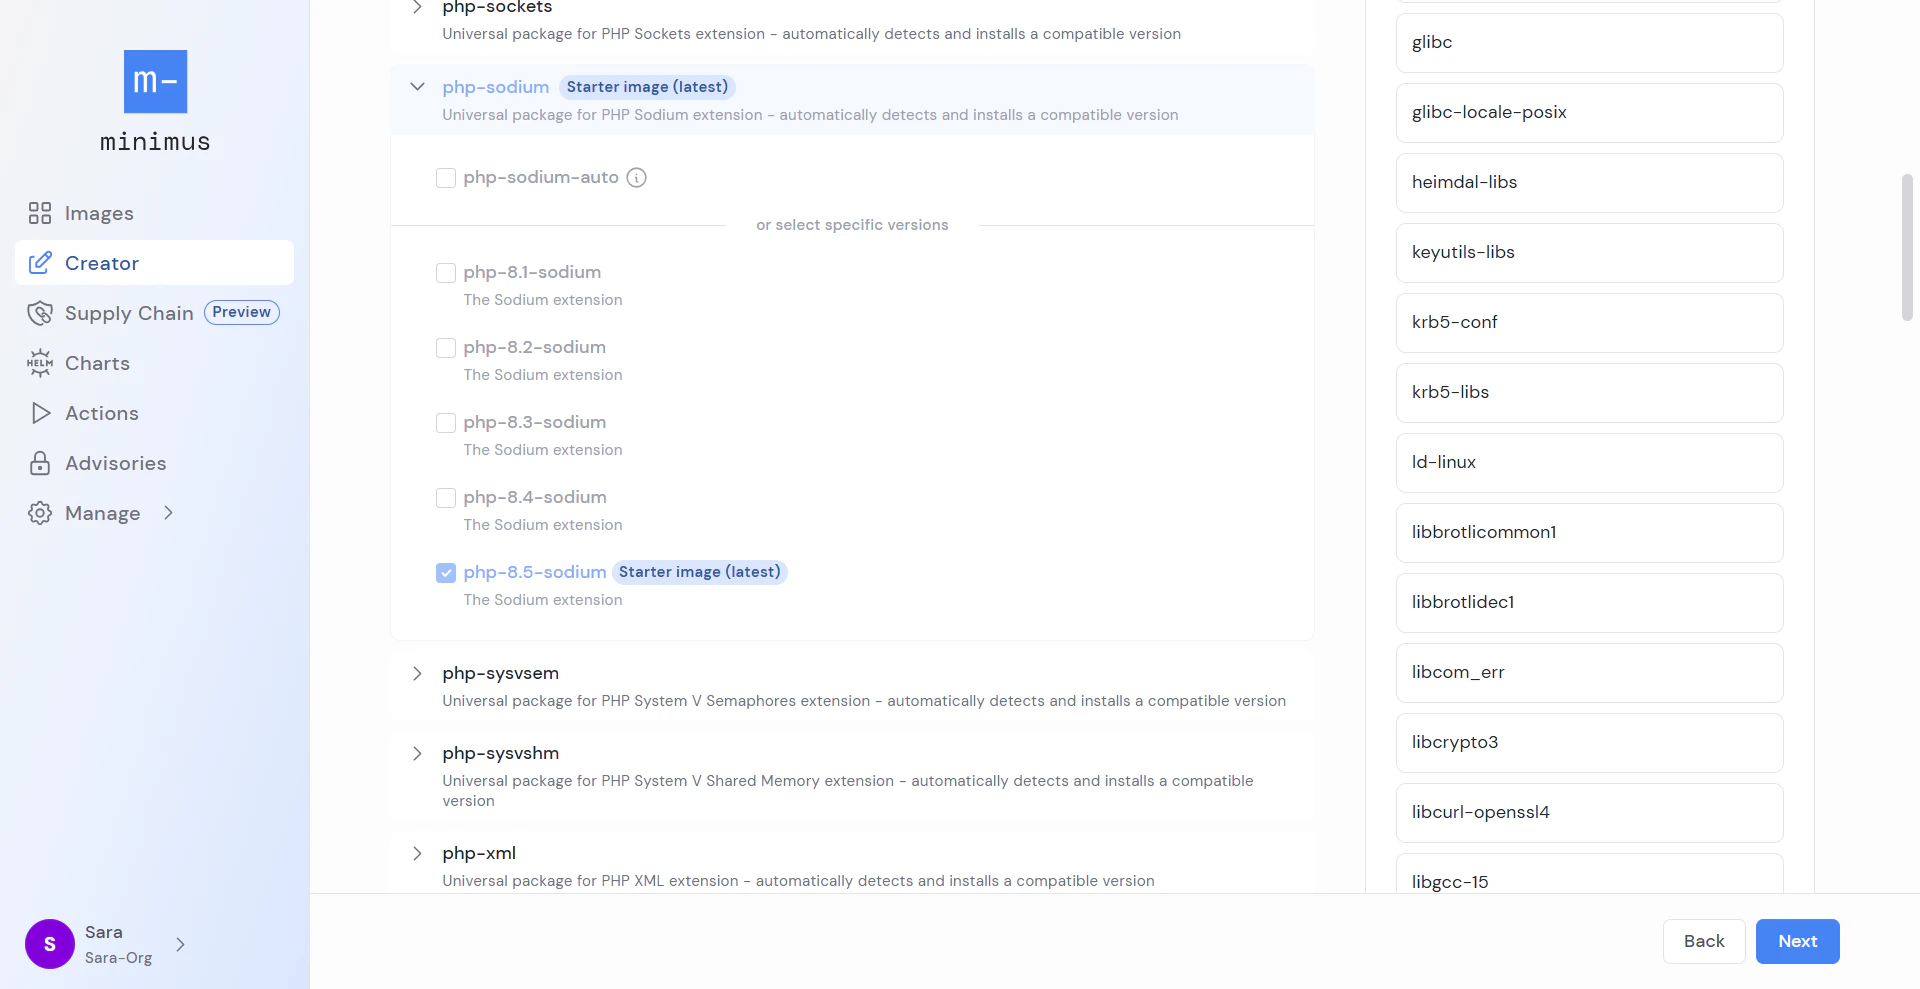
-
If the auto-package is selected but a compatible version is not found, Minimus Creator will skip it. The SBOM will still show the auto-package but not any specific version, to indicate that the package was skipped.
For example, the PHP Imagick extension only has versions for
php-8.4-imagickor higher. If it is added to a PHP starter image, image line 8.5 will be built with the matching versionphp-8.5-imagick, and image line 8.4 will be built with the matching versionphp-8.4-imagick.Image lines 8.3 and 8.2 will skip the package and their SBOM will only show the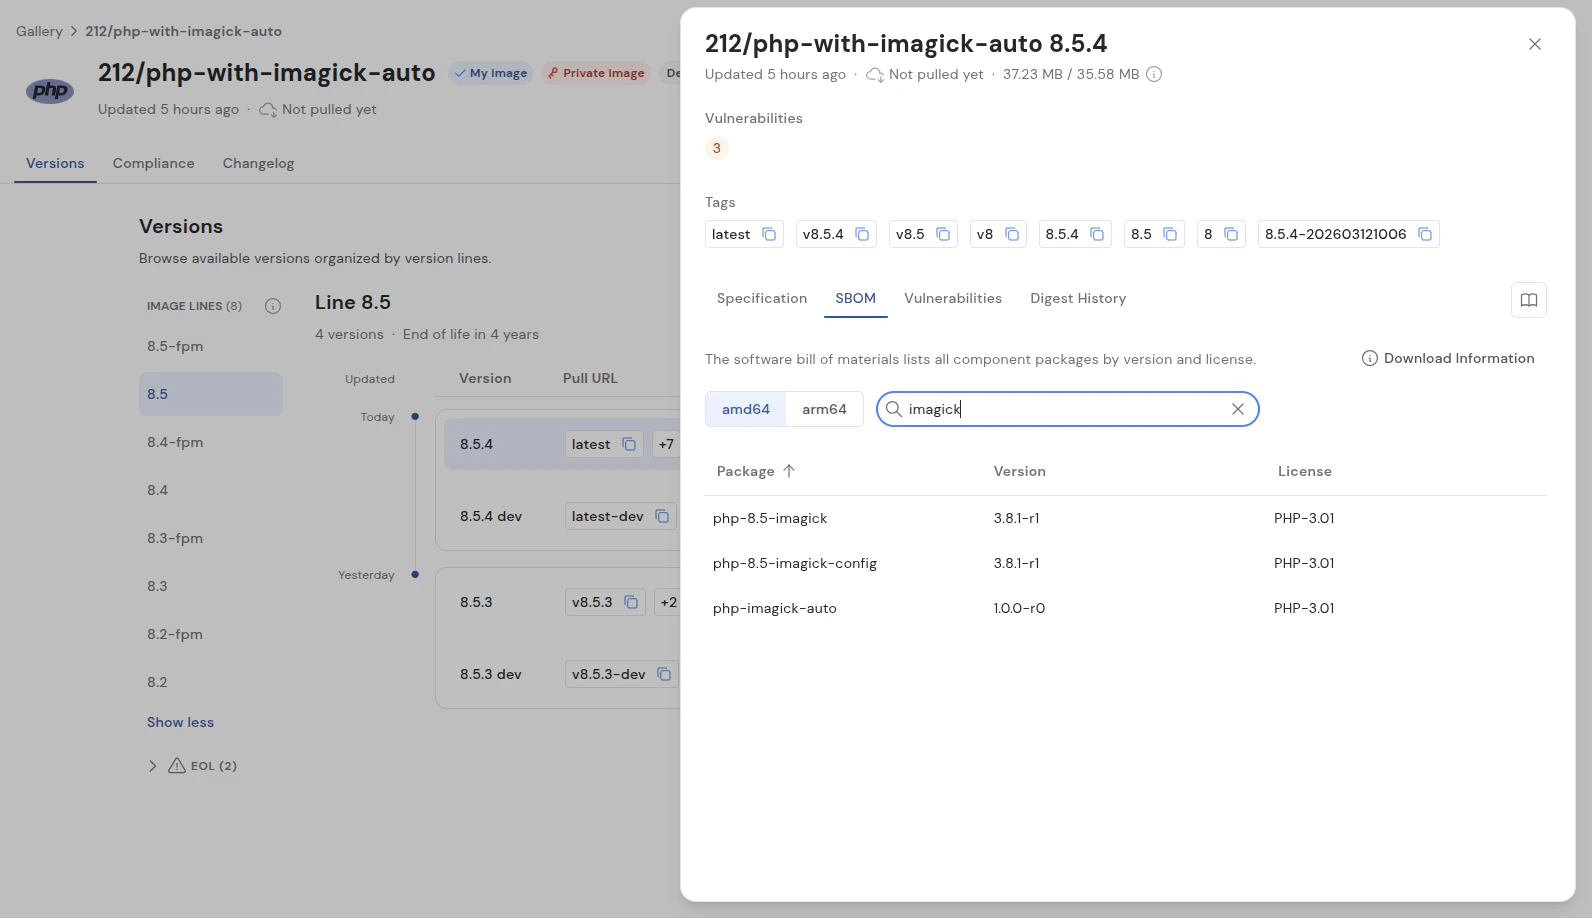
php-imagick-autopackage without any specific version to indicate that the package was skipped.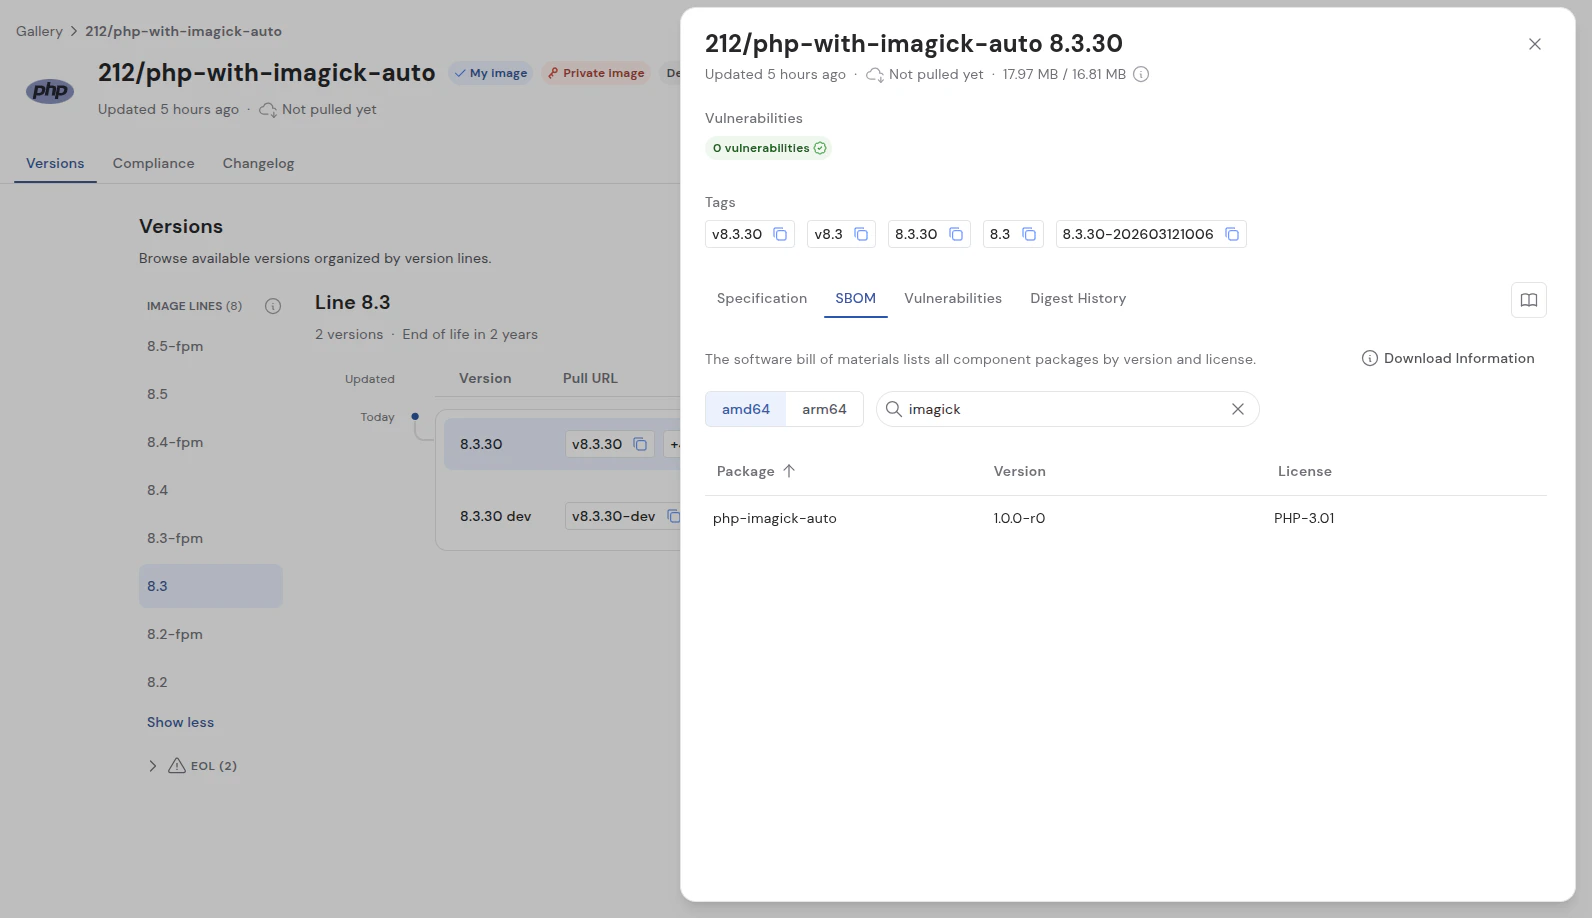
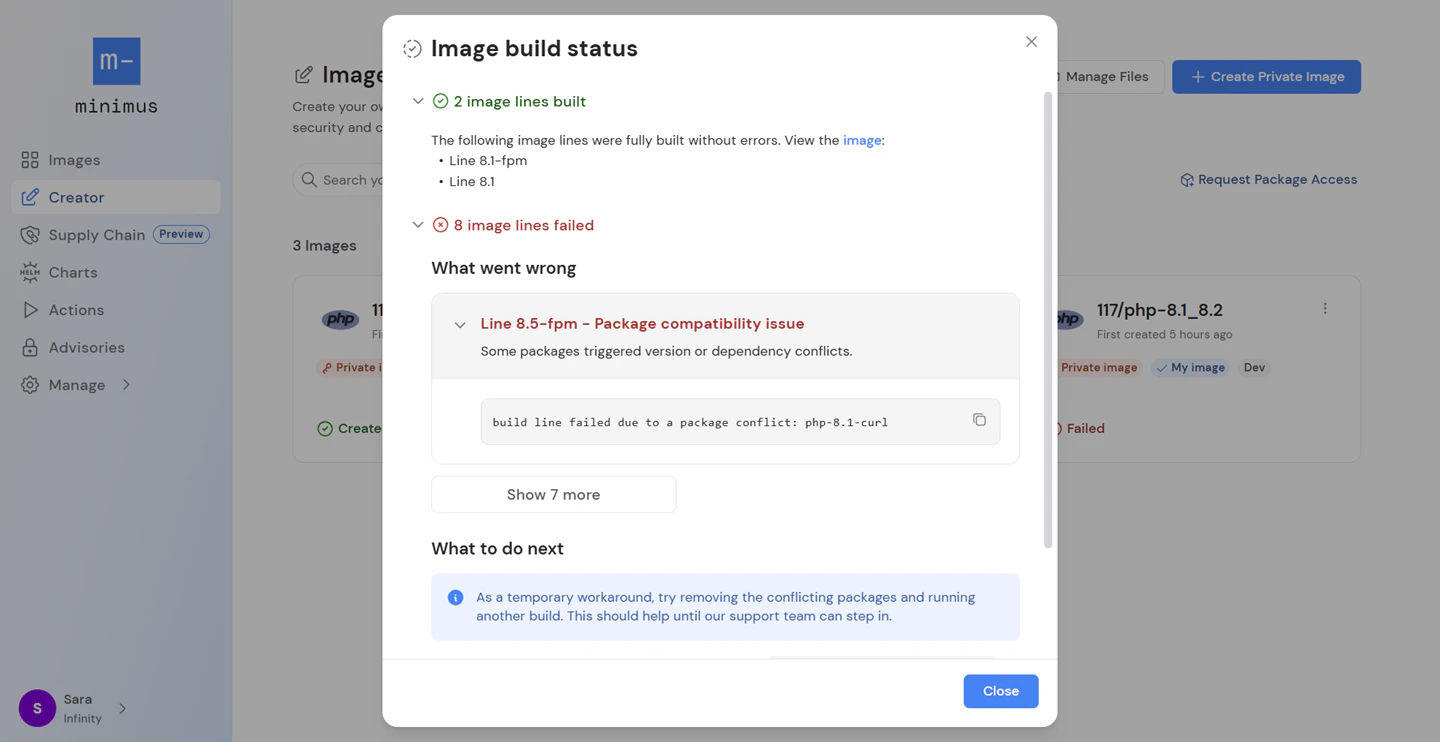
Handling package version conflicts
Minimus will attempt to build a private image for the newest version of each image line. If a particular image line runs into version conflicts with added packages, Minimus will skip it. The final private image will only include image lines that build successfully without errors. To avoid broken builds, Minimus handles potential package version conflicts in private images automatically: Minimus will attempt to build a private image for every maintained image line of the starter image and skip image lines that don’t build successfully.Mutable tags
Mutable tags (aka floating tags) refer to tags likelatest that reference a different image over time. The version tagged as latest in the private image might not be the same as the starter image, as a consequence of the private image skipping image lines due to conflicts. The general rule is the most advanced version available is tagged as latest.
For example, the latest tag may refer to version 8.3 for a private image and version 8.4 for the starter image. This would happen if the private image skipped 8.4 due to compatibility issues. In this case, the mutable tag 8 would also refer to different image lines, and so forth.
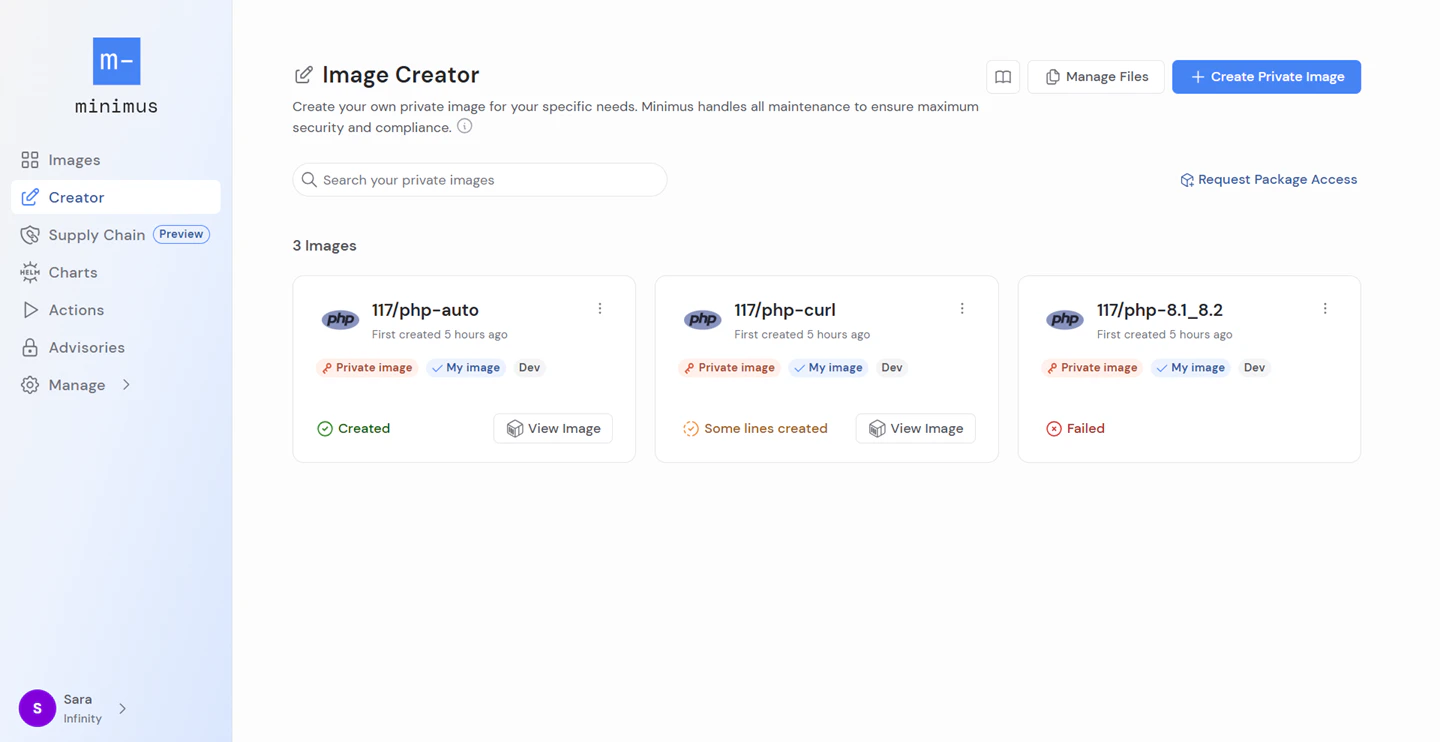
Managing private images
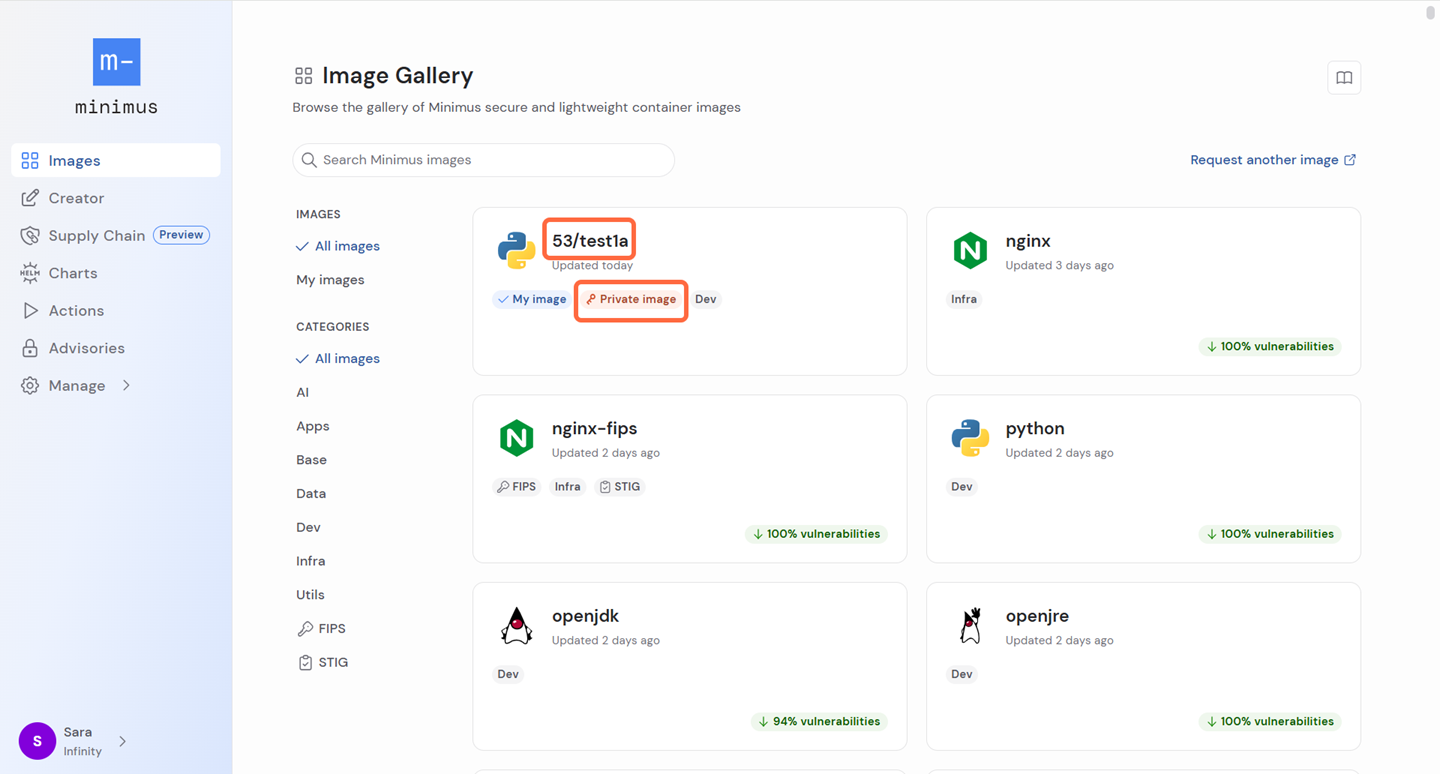
Viewing your private images
To view a gallery of all your private images, go to Image Creator. Here you can create a new private image and edit and manage your existing private images. Private images are also easy to identify in the image gallery:- Private images are labeled as private images
- Private images always have a name that begins with the tenant ID, for example,
53/image-name.
Editing a private image
You can update the added packages and env variables for your private images. The starter image and image name are fixed and cannot be changed. Once updated, the private image will be rebuilt. To edit a private image, go to Image Creator and select Edit in the image menu.Deleting a private image
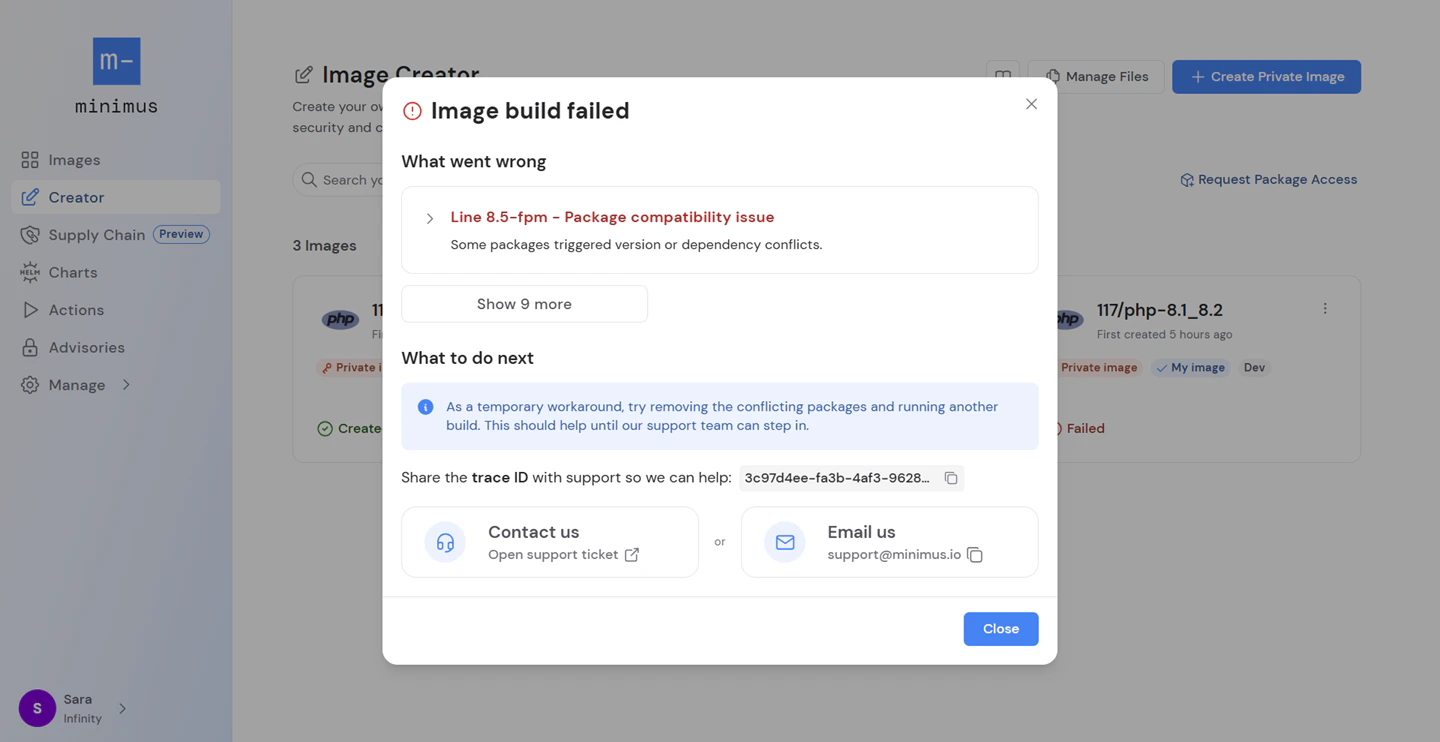
Private images are all about experimentation. Easily remove outdated or unhelpful private images from your Minimus console. To delete a private image, go to Image Creator and select Delete in the image menu.Troubleshooting failed builds
To view the build status for your private image, go to Image Creator. The image card will show the build status on the bottom left. If there were errors, click the status to view more details.