Creator vs. package access
Image Creator is the standard choice when working with Minimus because it allows Minimus to handle all of the following for you:- Package version updates. See advisories
- Image updates. See daily builds
- Vulnerability reports. See image version card
- Changelog. See image card
- Builds of all versions. See versions
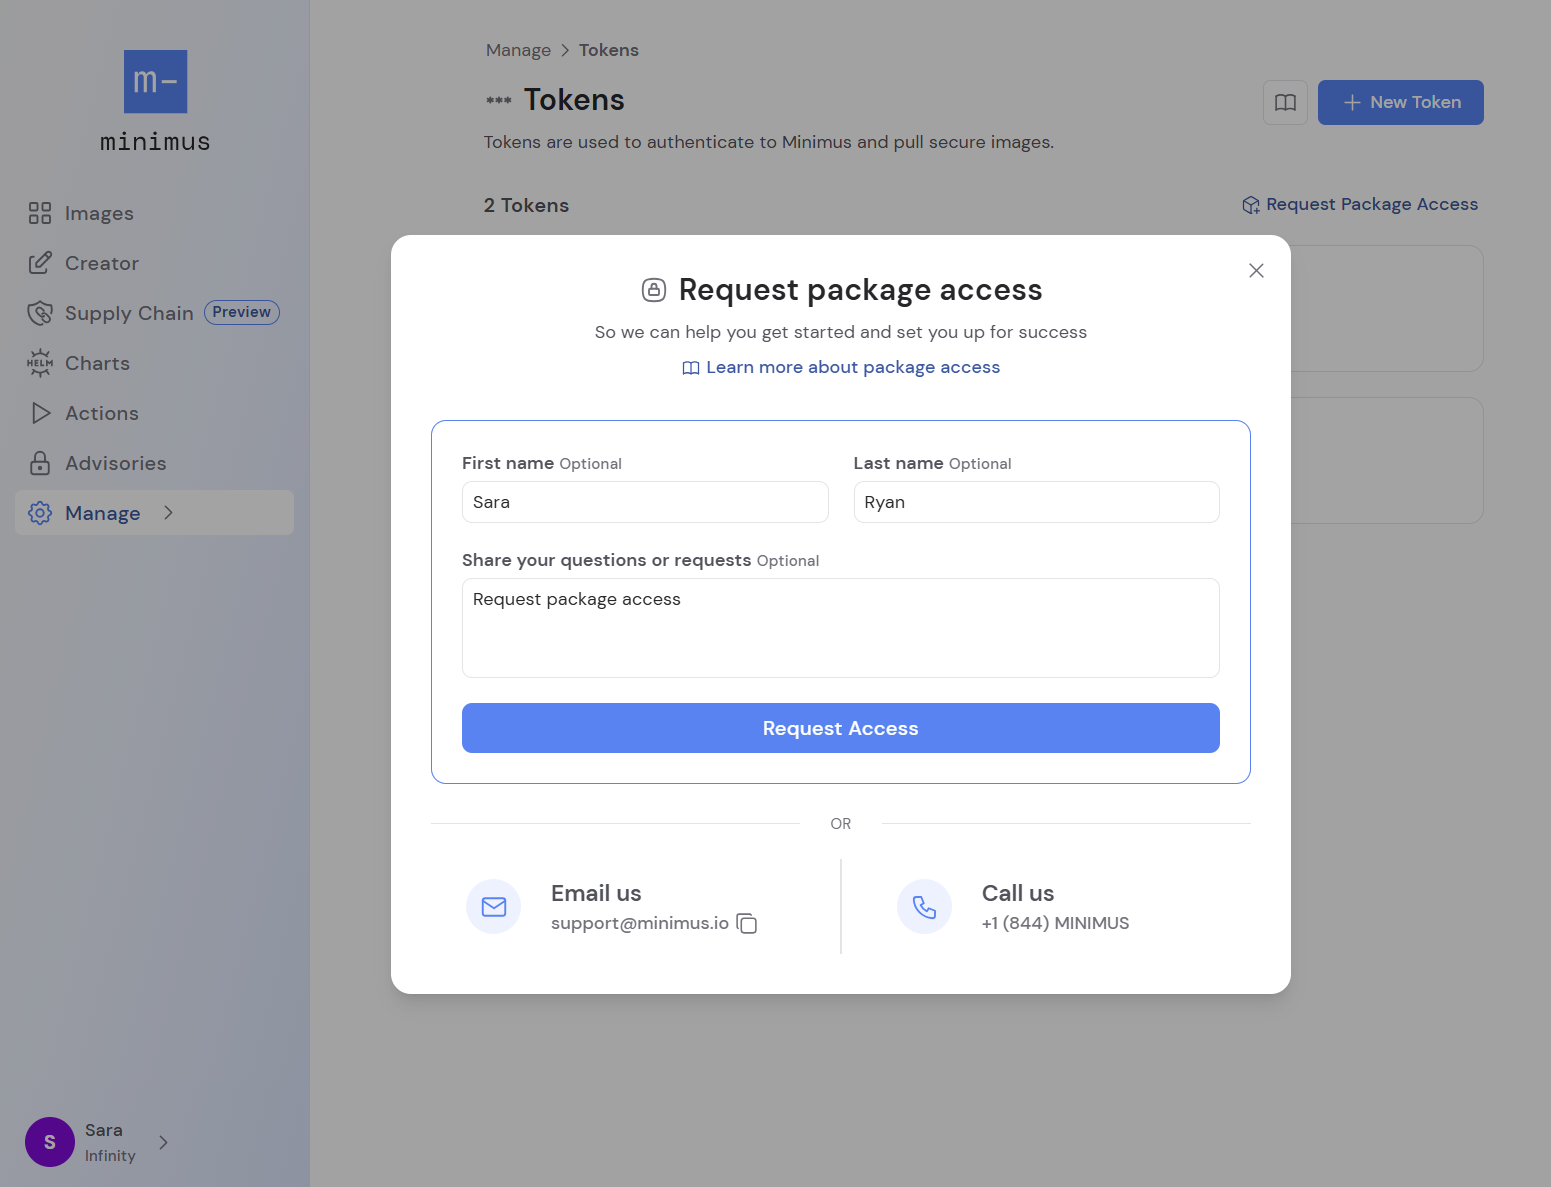
Requesting package access
Package access is not enabled by default, so you’ll need to request access to have it enabled for your tenant. Visit the Tokens page in your Minimus console and select the option to Request package access.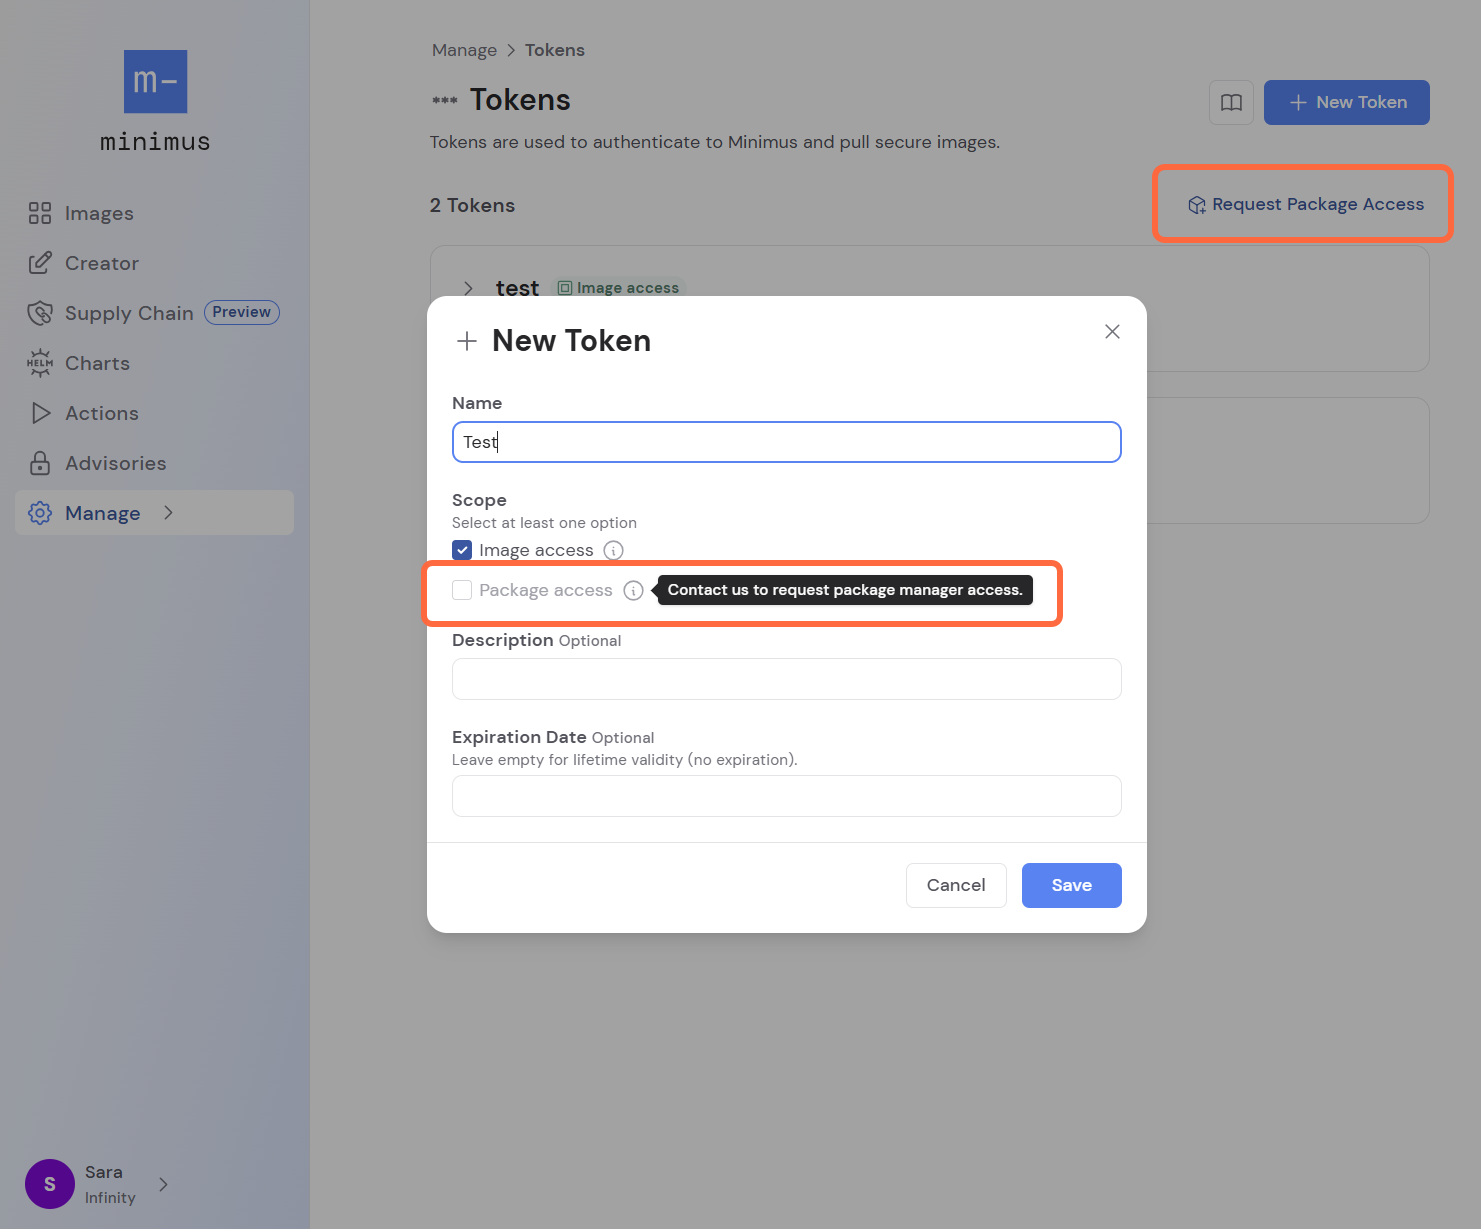
Authenticate to packages.mini.dev
Learn how to authenticate to the Minimus Package Repository both at runtime and during the Docker build process.Prerequisites
When installing packages, make sure to use Minimus containers that meet both conditions:- Can run
apkcommands - Minimusdevimages fit the bill - Run as root - usually this is not the default in Minimus images so you’ll need to switch to a root user
During runtime (inside a container)
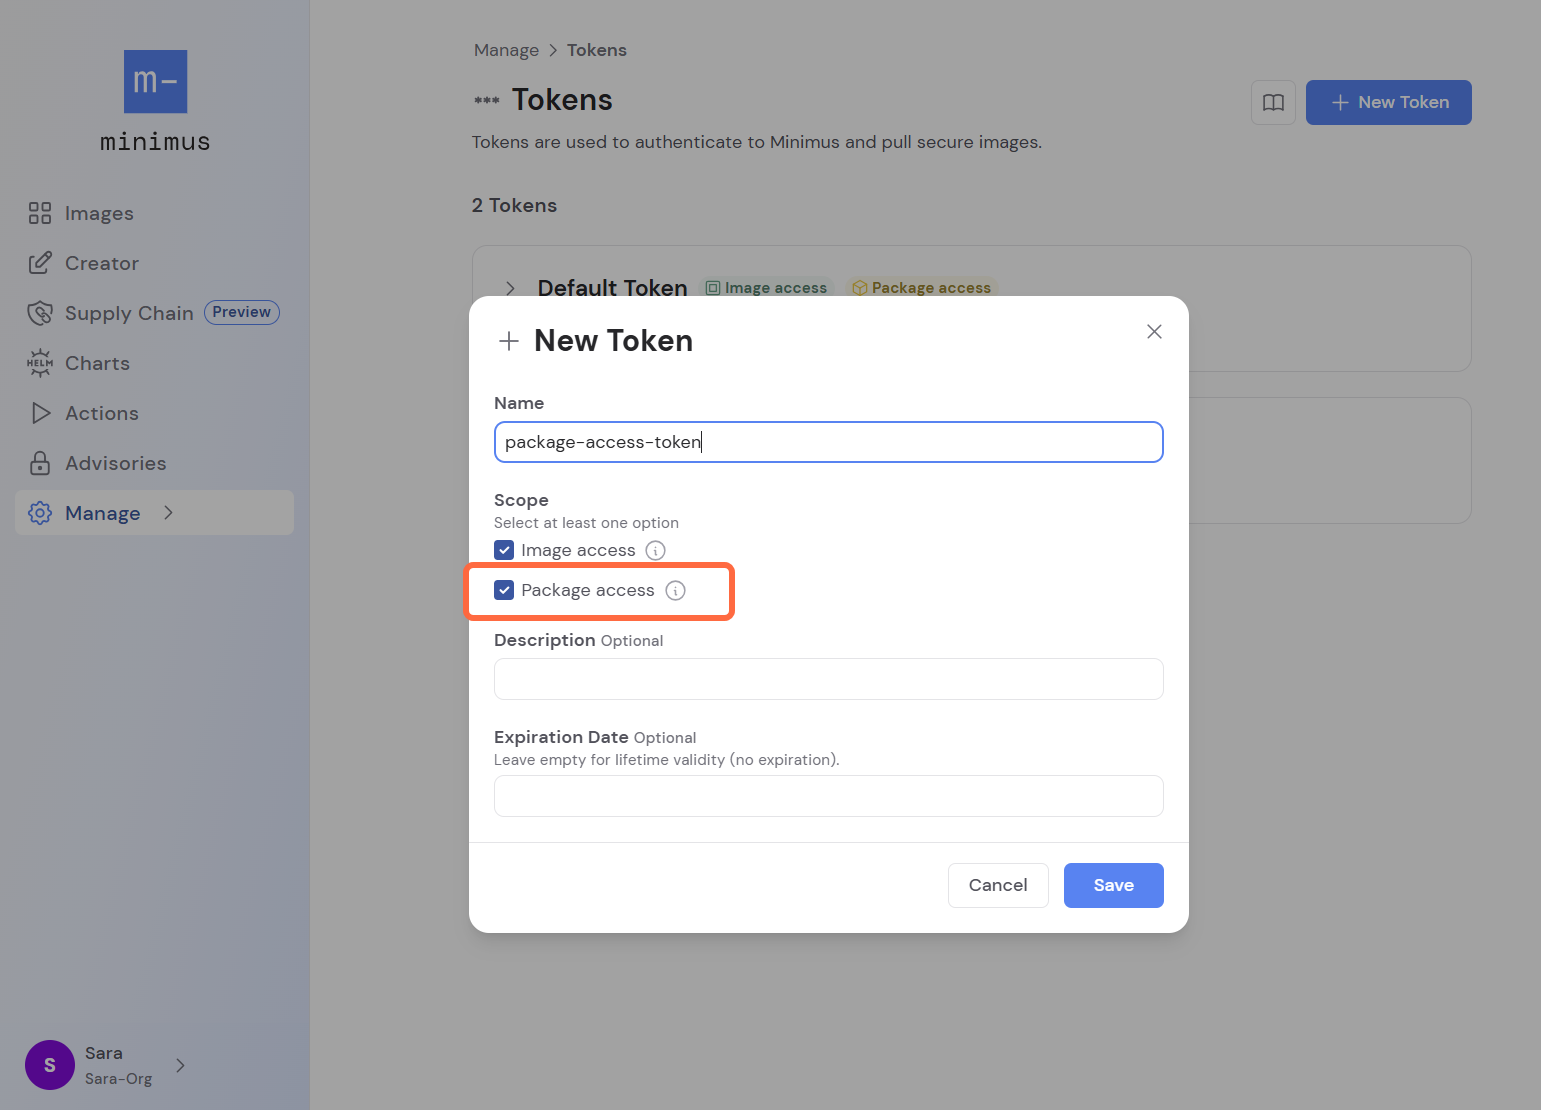
- Create a token with package access scope. See tokens
- Run a Minimus docker container as root and make sure the container includes
apk. For example, you can run the Bash image with thelatest-devtag: - In the container, authenticate to the Minimus package registry:
Once authenticated, the session will remain active until the token expires.package access command
- Add packages as usual. For example, you can add
git:
In a Dockerfile
You can install packages directly within your Dockerfile by authenticating during the image build. As is standard practice in CI pipelines, this approach uses a build variable like${REPO_PASS} to securely handle credentials.
Below is an example of the code to be added to your Dockerfile:
Dockerfile HTTP_AUTH code
Python tutorial example (multi-stage build)
The following example builds on the multi-stage pattern from the Minimus Python guide. We will follow the steps in the original guide, replacing only the Dockerfile and build command. The Dockerfile uses alatest-dev builder for package installation and Python dependencies and switches to the minimal Python image at runtime.
Dockerfile with apk add steps
apk commands stay in the latest-dev build stage and are executed as USER root to avoid Unable to lock database: Permission denied. The runtime image reg.mini.dev/python:latest is distroless and does not include /bin/sh, so RUN apk ... is not supported there.
Add your Minimus token to the build command:
Runtime Troubleshooting
Auth error
If the remote server returns an error, most likely authentication failed because your token doesn’t include package access. For example:WARNING: updating and opening https://packages.mini.dev/os: remote server returned error (try 'apk update')
To fix the issue, edit your token or create a new one with package access scope. See tokens
Permission denied
If you get an error that permission was denied, most likely you are running as a non-root user and can’t modify system files. For example:ERROR: Unable to lock database: Permission denied ERROR: Failed to open apk database: Permission denied
To fix the issue, run the container with -u root to override the default user at runtime.
APK not found
If you try to runHTTP_AUTH="basic:packages.mini.dev:token" and get an error bash: apk: command not found, this means you are using a Minimus image that is not able to run apk commands.
To fix the issue, run a Minimus dev image so it includes dev tools.
Dockerfile Troubleshooting
Auth error
If you get an error that ends withexit code: 2, most likely authentication failed because your token doesn’t include package access.
For example: failed to solve: process "/bin/sh -c apk update && apk add --no-cache <pkg1> <pkg2>" did not complete successfully: exit code: 2
To fix the issue, edit your token or create a new one with package access scope. See tokens
Permission denied
If you get an error that ends withexit code: 99, most likely you are running as a non-root user and can’t modify system files.
For example: failed to solve: process "/bin/sh -c apk update && apk add --no-cache <pkg1> <pkg2>" did not complete successfully: exit code: 99
To fix the issue, edit your Dockerfile to switch to the root user before running the apk commands.