Prepare the SSO form in Minimus
- Go to Manage > Users & Groups (direct link)
- Click Configure SSO at the top of the page to open the Minimus SSO form.
- The form has 4 parts:
- Configure Minimus as a custom app in your identity provider - You will copy these parameters from Minimus to Keycloak in the next steps.
- SP Entity ID
- Reply URL (Callback / ACS URL)
- Relay State (optional) - If you leave the Relay State blank, users will only be able to login with SSO from the Minimus homepage.
- Connect Minimus to your identity provider - You will fetch these parameters from your Keycloak client and save them to the Minimus form:
- Login SSO URL
- IdP Entity ID
- Certificate
- SAML Attribute Mapping - You will fetch the Keycloak claim names for the following parameters and save them to the Minimus form:
Minimus Parameter Keycloak Attribute Name Email user.mail Full Name user.userprincipalname - Group Mapping is optional and can be enabled if you plan to configure user groups. See the instructions in user groups.
- Configure Minimus as a custom app in your identity provider - You will copy these parameters from Minimus to Keycloak in the next steps.
Add Minimus as a client in Keycloak
Create a Minimus client in Keycloak
The first step is to create the Minimus client in Keycloak and link it to your Minimus Console.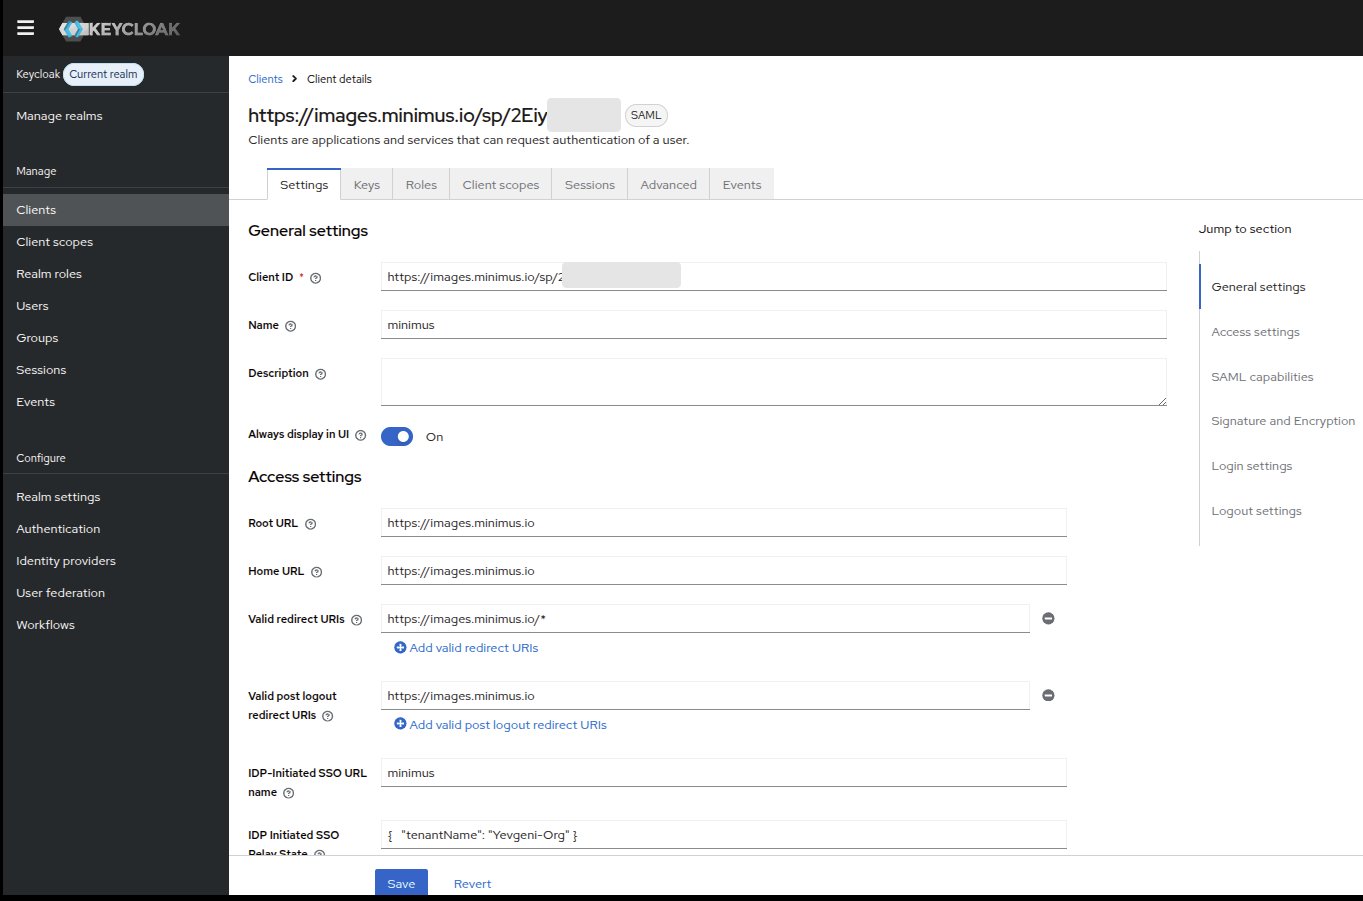
- Go to Clients to begin.
- Select the option Create client.
- Select Client Type - SAML.
- Copy the value from Minimus SP Entity ID to the Client ID field.
- Set the following as
https://images.minimus.io:- Root URL
- Home URL
- Valid post logout redirect URIs
- Set the Valid Redirect URI to
https://images.minimus.io/* - Set the IDP-Initiated SSO URL name as
minimus - Set IDP Initiated SSO Relay State Relay State, for example:
- Set the Master SAML Processing URL as
https://images.minimus.io/saml/callback - Save your changes.
Configure the SAML
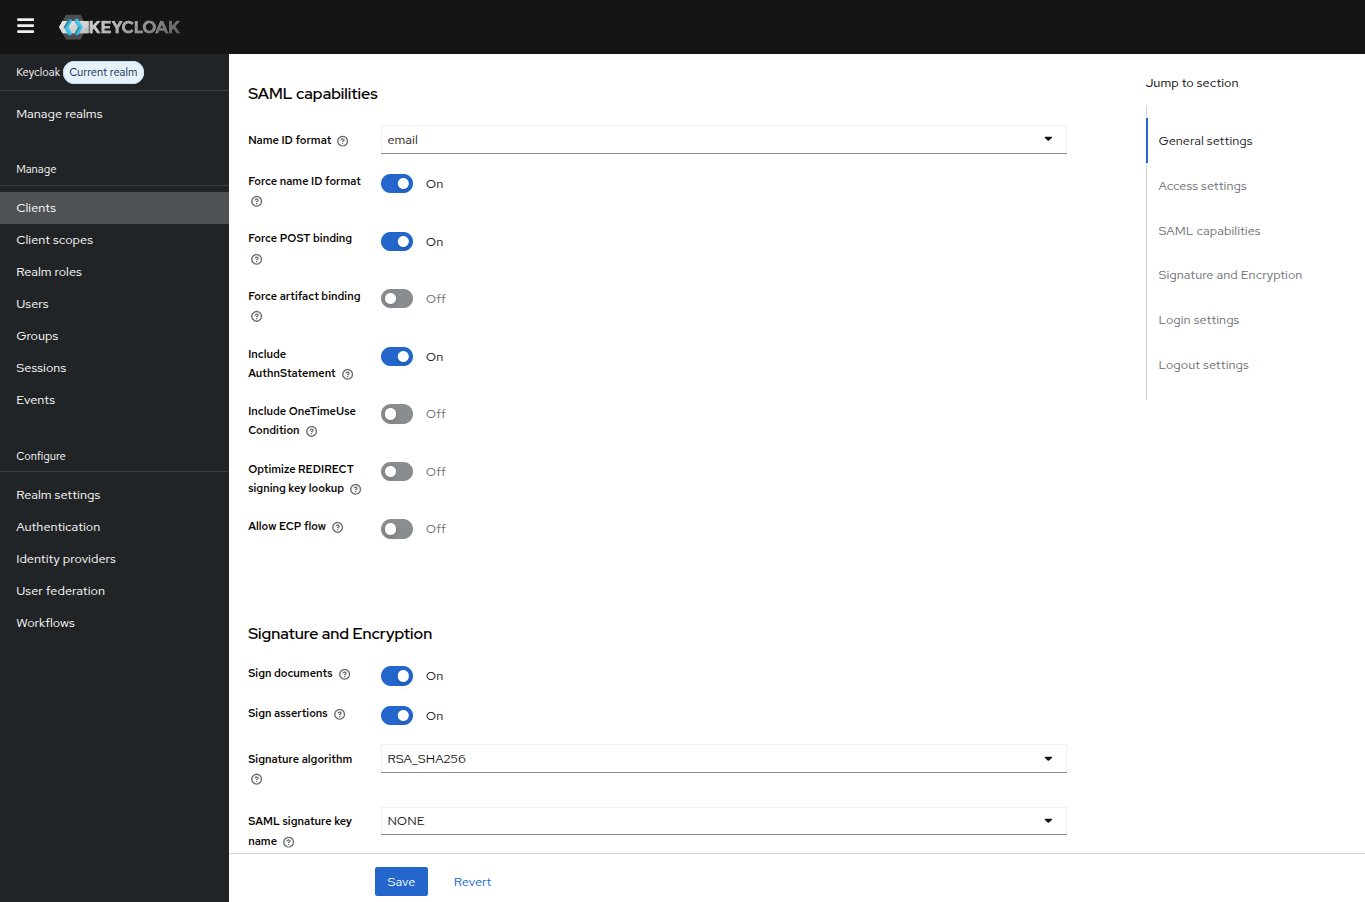
- Configure the following SAML capabilities:
- Name ID format - email
- Force name ID format - ON
- Force POST binding - ON
- Go to the Keys tab and turn off Client signature required.
- Go to the Client scopes tab and click on your Client ID.
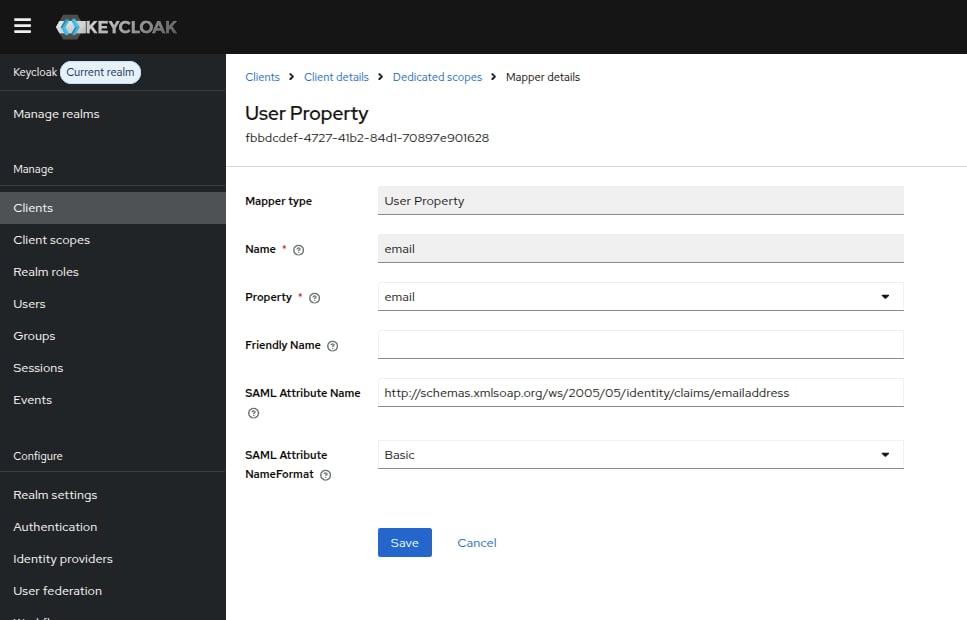
- Click on Configure a new mapper and select User Property.
- Fill the mapper attributes:
- Name -
email - Property -
email - SAML Attribute Name -
http://schemas.xmlsoap.org/ws/2005/05/identity/claims/emailaddress - SAML Attribute NameFormat - Basic
- Name -
- Save your changes.
Configure a mapper
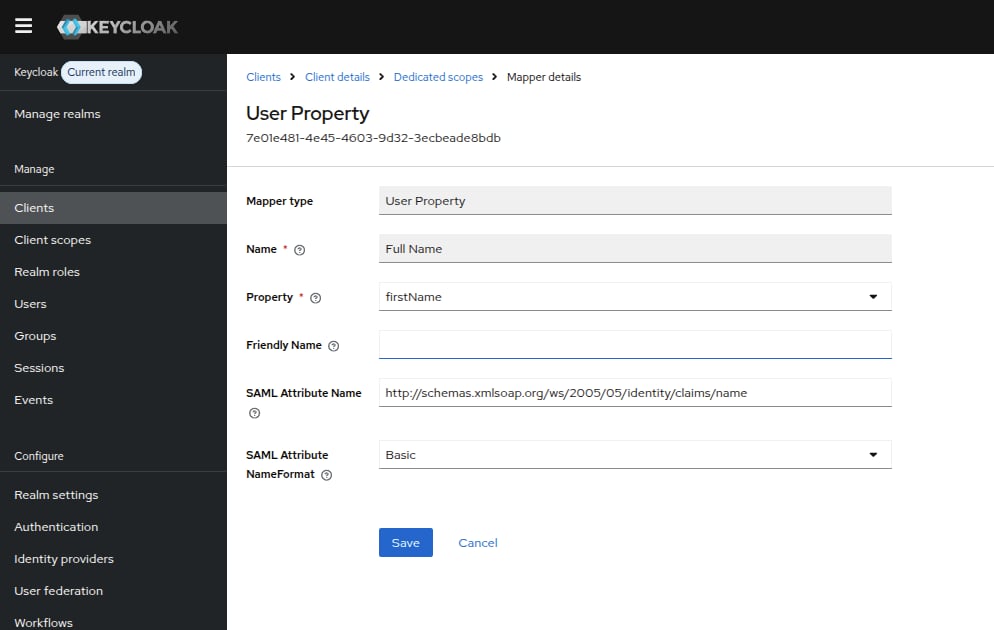
- Click on Configure a new mapper and select User Property.
- Fill the mapper attributes:
- Name -
fullName - Property -
firstName - SAML Attribute Name -
http://schemas.xmlsoap.org/ws/2005/05/identity/claims/name - SAML Attribute NameFormat - Basic
- Name -
- Save your changes.
Copy the certificate
- In the left menu, select Realm settings.
- In the General tab, select SAML 2.0 Identity Provider Metadata.
- Copy the certificate between
<ds:X509Certificate>and</ds:X509Certificate>.
Configure the SAML in Minimus
- In your Minimus console, go to Manage > Users & Groups > Configure SSO.
- Fill the following fields:
- IdP Entity ID -
https://YOUR_KEYCLOAK_EXTERNAL_IP_OR_URL/realms/master - Login URL -
https://YOUR_KEYCLOAK_EXTERNAL_IP_OR_URL/realms/master/protocol/saml - Certificate - Paste the certificate you copied in the previous step.
- IdP Entity ID -
- SAML Attribute Mapping setup - put the following values in the fields:
- Email -
http://schemas.xmlsoap.org/ws/2005/05/identity/claims/emailaddress - Full Name -
http://schemas.xmlsoap.org/ws/2005/05/identity/claims/name - Group Mapping -
groups
- Email -
- Save your changes.